I recently bought Tabletop Simulator (TTS) during the winter Steam sale. For those of you who never heard of it, it is an engine allowing people to play board games virtually. It is not a game per say as there is no artificial intelligence programmed in and the software has no idea about the rules of the game played. It is more like an engine allowing you to simulate the condition of you and your friends sitting at a table playing board games. Most games are possible from classic games like Chess and Backgammon to modern classics like Clue or Monopoly. I was browsing the Steam Workshop where you can download new board game and where people can share their own creation with other users and remembered something. A few weeks before, I had found a single game piece from a game I used to love as a kid while I was at my parent's house. The game in question was The Hamburger Game and I had totally forgotten about it until that moment. It's a simple game for kids that's best described as what would happen if a board game and a memory matching game had a baby together. Upon remembering this, I went out and searched online hoping that someone had already converted my beloved childhood game but sadly, it seemed that it was not the case as I had expected. Only thing left to do was to do it myself! It also seemed like the perfect opportunity to learn the basic of 3D modelling, something I have been wanting to do for a while.
Now, the easy way to achieve this would have been to simply find or take a picture of the game board and game piece, load them into the game and use a generic square 3d model to use as a game piece but if you have read any of my past articles, you'll know that it is not my style. So I set out to recreate the game completely, not only modelling the game tiles in 3D to the exact measurement but decided I would also try to completely redraw all of the game's artwork as high resolution vector image so that the game texture would be the crispest they can be while playing the game.
First thing I had to do was to find high-resolution scan/picture of the game and all of its pieces. Considering I had only a single game tile available, I tried to find the game for sale on eBay and such but couldn't find much except a slightly more recent German edition or overpriced auction. I was lucky enough that a website called Boardgamesgeek had a few decent pictures of the game available in their database and I was able to use those as a basis for redrawing the game board. I was also able to get the higher resolution shots I was missing from a nice guy named Simon that I tracked on the Boardgamesgeek site and agreed to provide me what I needed. For this, I used Photoshop but you could use Gimp (free) or other image editing software to do the same.
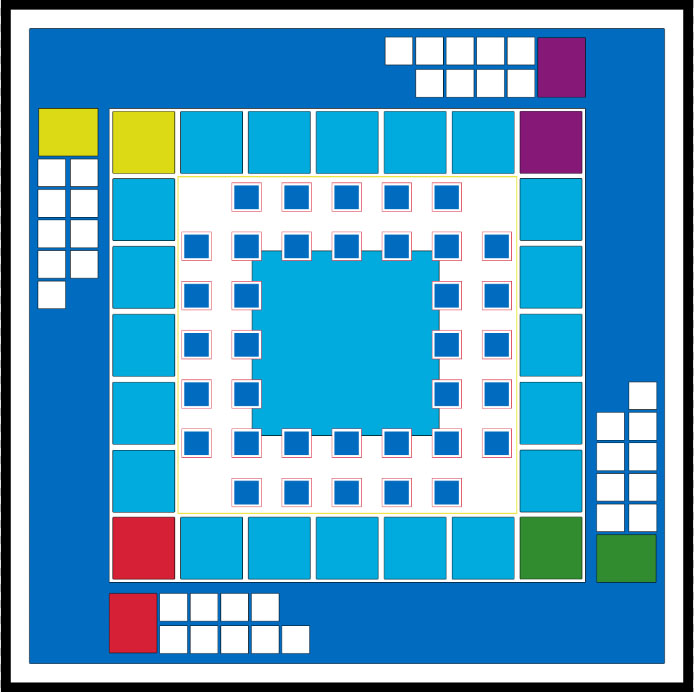
Using the board scan as a template, I tried to redraw every section of the board as accurately as possible while leaving the game artwork for later.
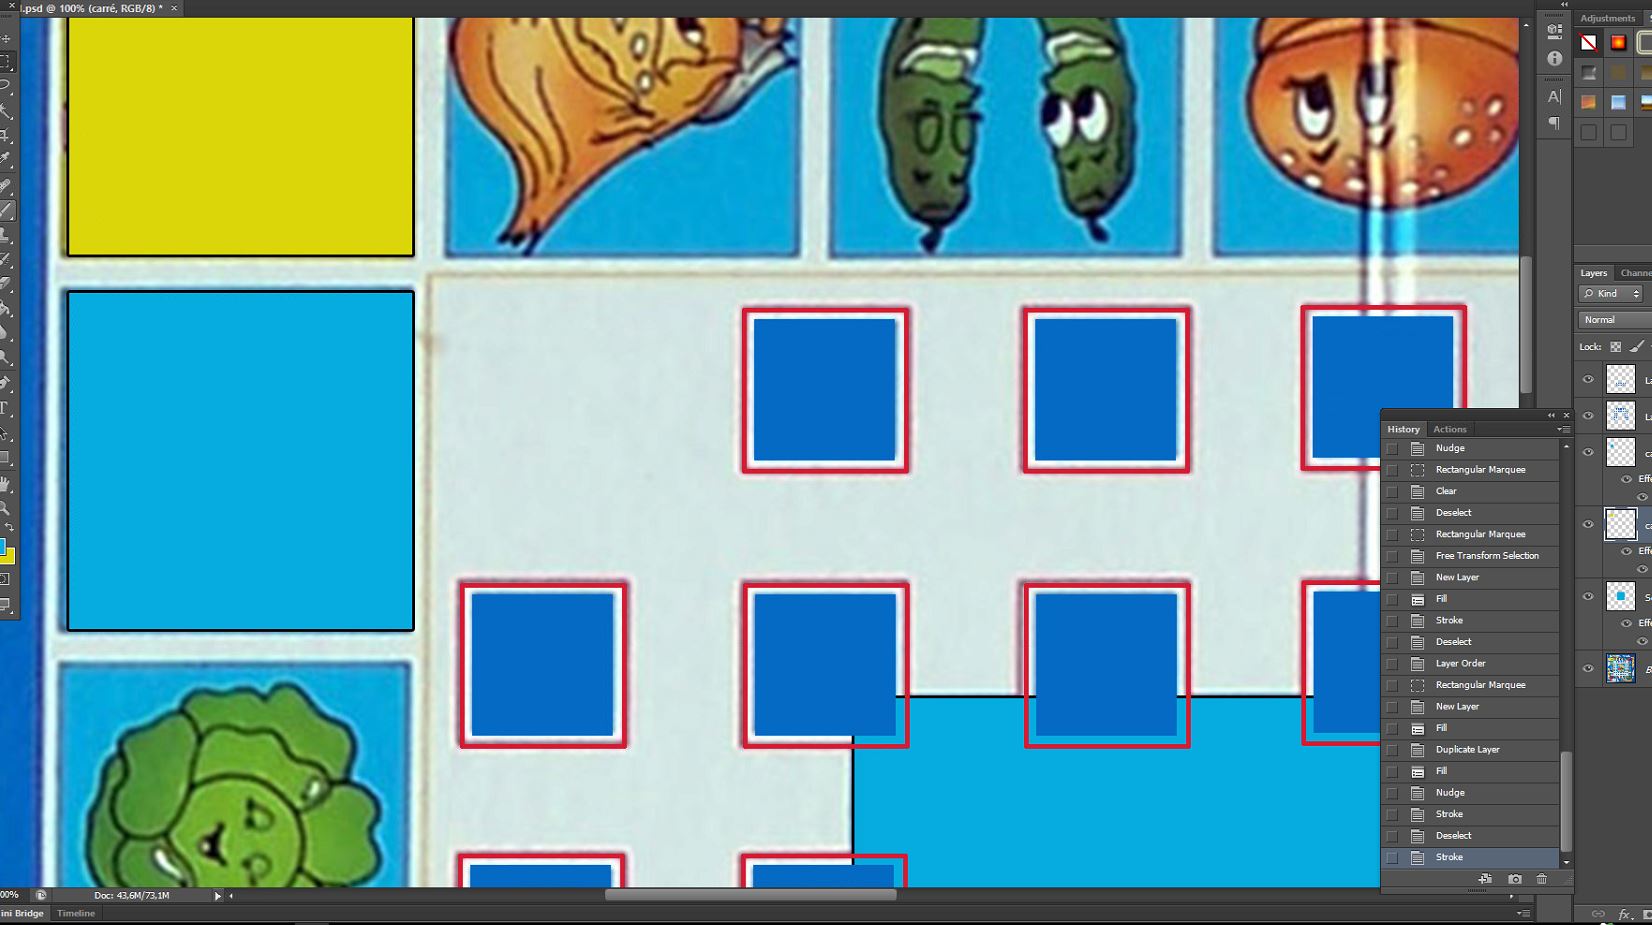
This is not so hard as it only contains straight lines and solid coloring, the only tricky part is when you are using a picture that wasn't taken completely straight, if that is the case you won't be able to just draw over line because of the perspective. But the picture I was using was fairly straight and the only issue was trying to get everything spaced out properly.
That was the easy part. Once the board was mostly done, I turned my attention to the games artworks. My original plan was to draw the outline of each graphic the way I usually did when digitally inking my sketch on the computer, using the pen tool and carefully following each line and curve. This usually works quite well and gives nice and crisp result but it takes a really long time to do properly and I had so many artworks to redraw it would have taken ages. So I decided to try something new and do this part in Illustrator instead. I have almost never used Illustrator before and always dreaded using it as every time I tried to do anything in it, I would get confused and frustrated almost right away. It is not because it is a bad software, on the contrary! It is just so different from Photoshop that it is a bit puzzling for someone that is used to Photoshop and even the smallest task would usually turn into a frustrating battle! I mean, just take a look at the eyedropper function, something so simple work so differently between the two software. But I recently became aware of the Live Paint feature of Illustrator and figured it might be my ticket to a quicker conversion.
I started by isolating the artworks by removing their background and went to experiment with livepaint setting. It was working OK, but it was tricky to get them right and figured that the software would have an easier time if it was only working with an outline so I went back in Photoshop and did my best to remove everything except a crude outline. I then tried to livepaint them and, just as I was expecting, it worked much better.
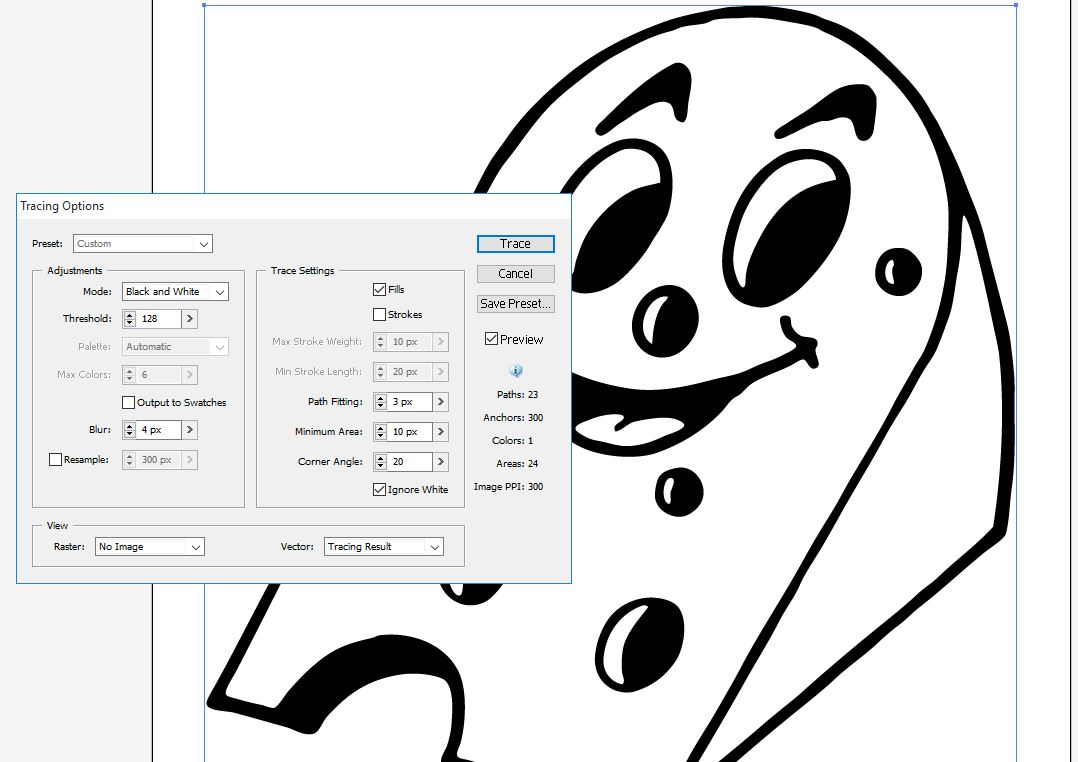
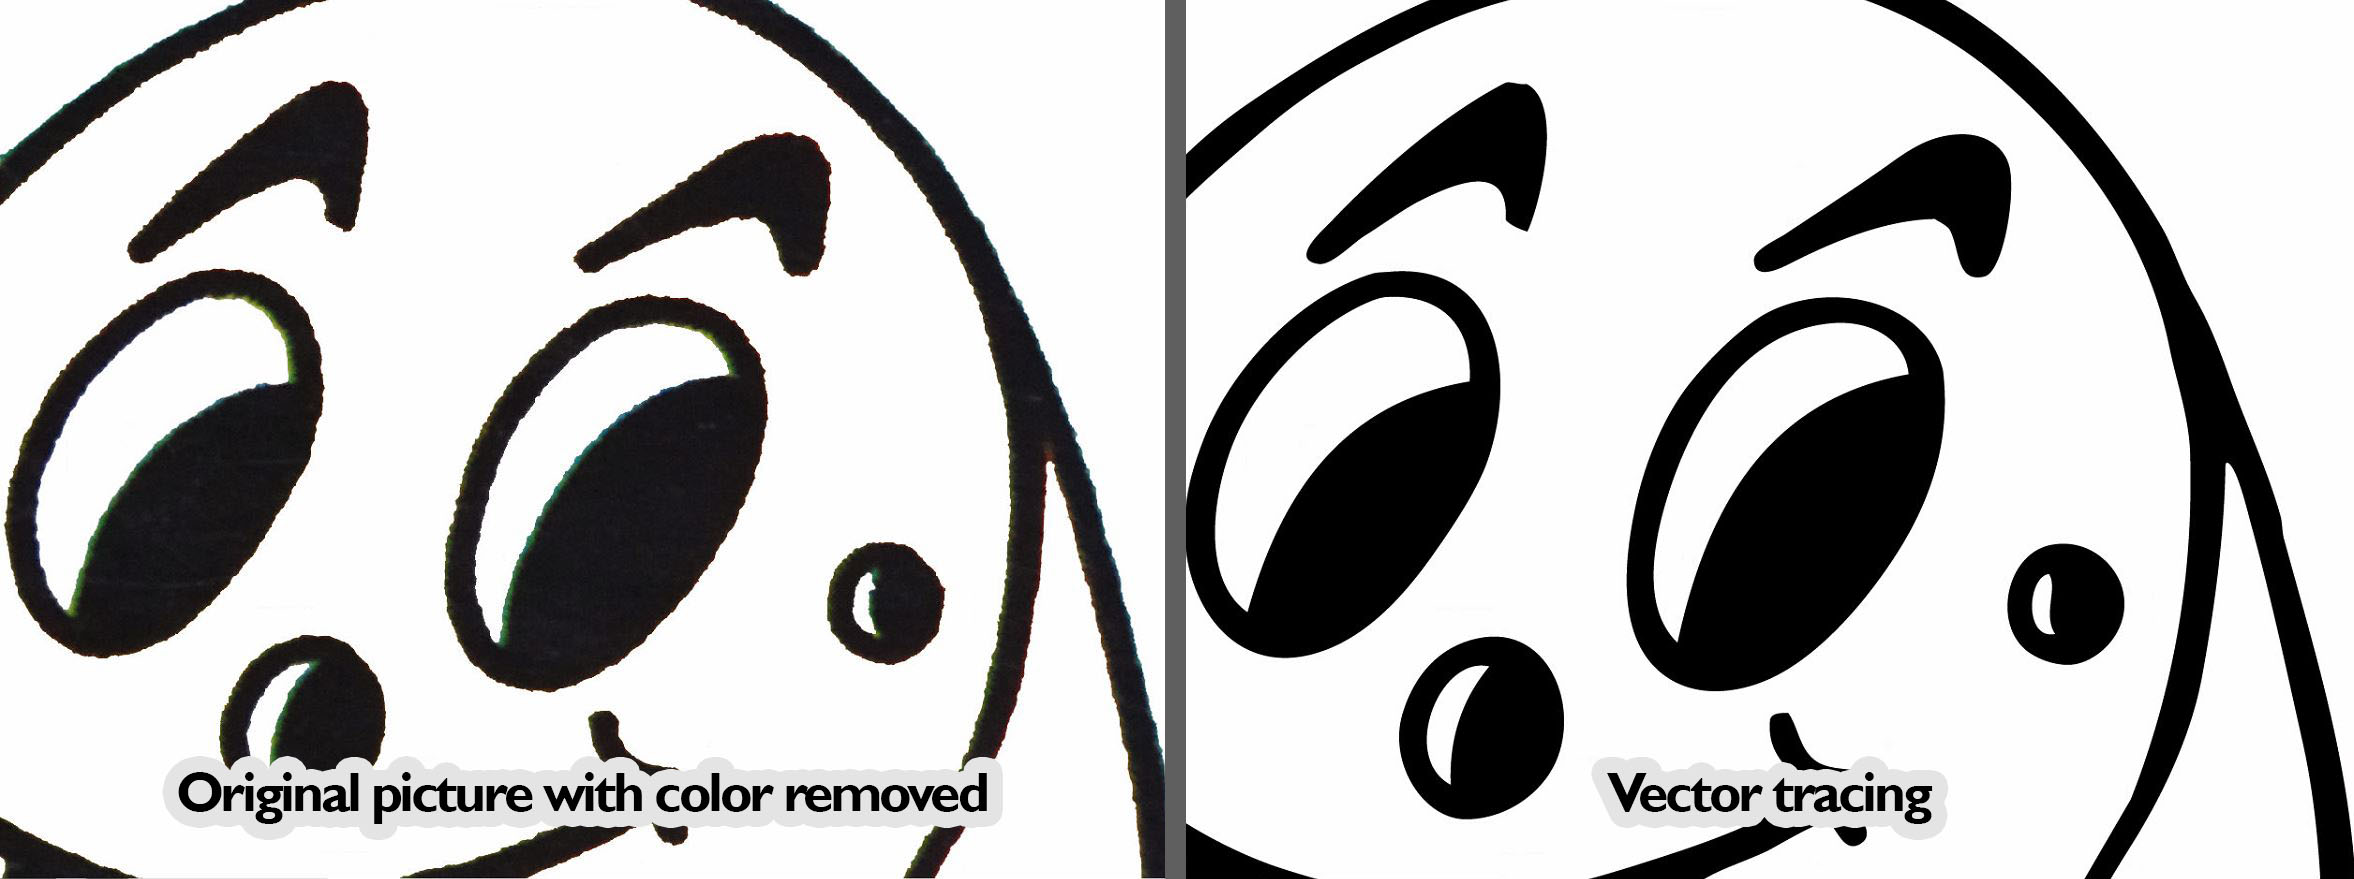
You could still see some jagged line and weird bump here and there at first but I was able to smooth things out by carefully using the Blur and Path fitting option. For the one that were more problematic and were more jagged, I was able to adjust them by removing or adjusting a few anchor points from the path to round off curve and straighten jaggy line.
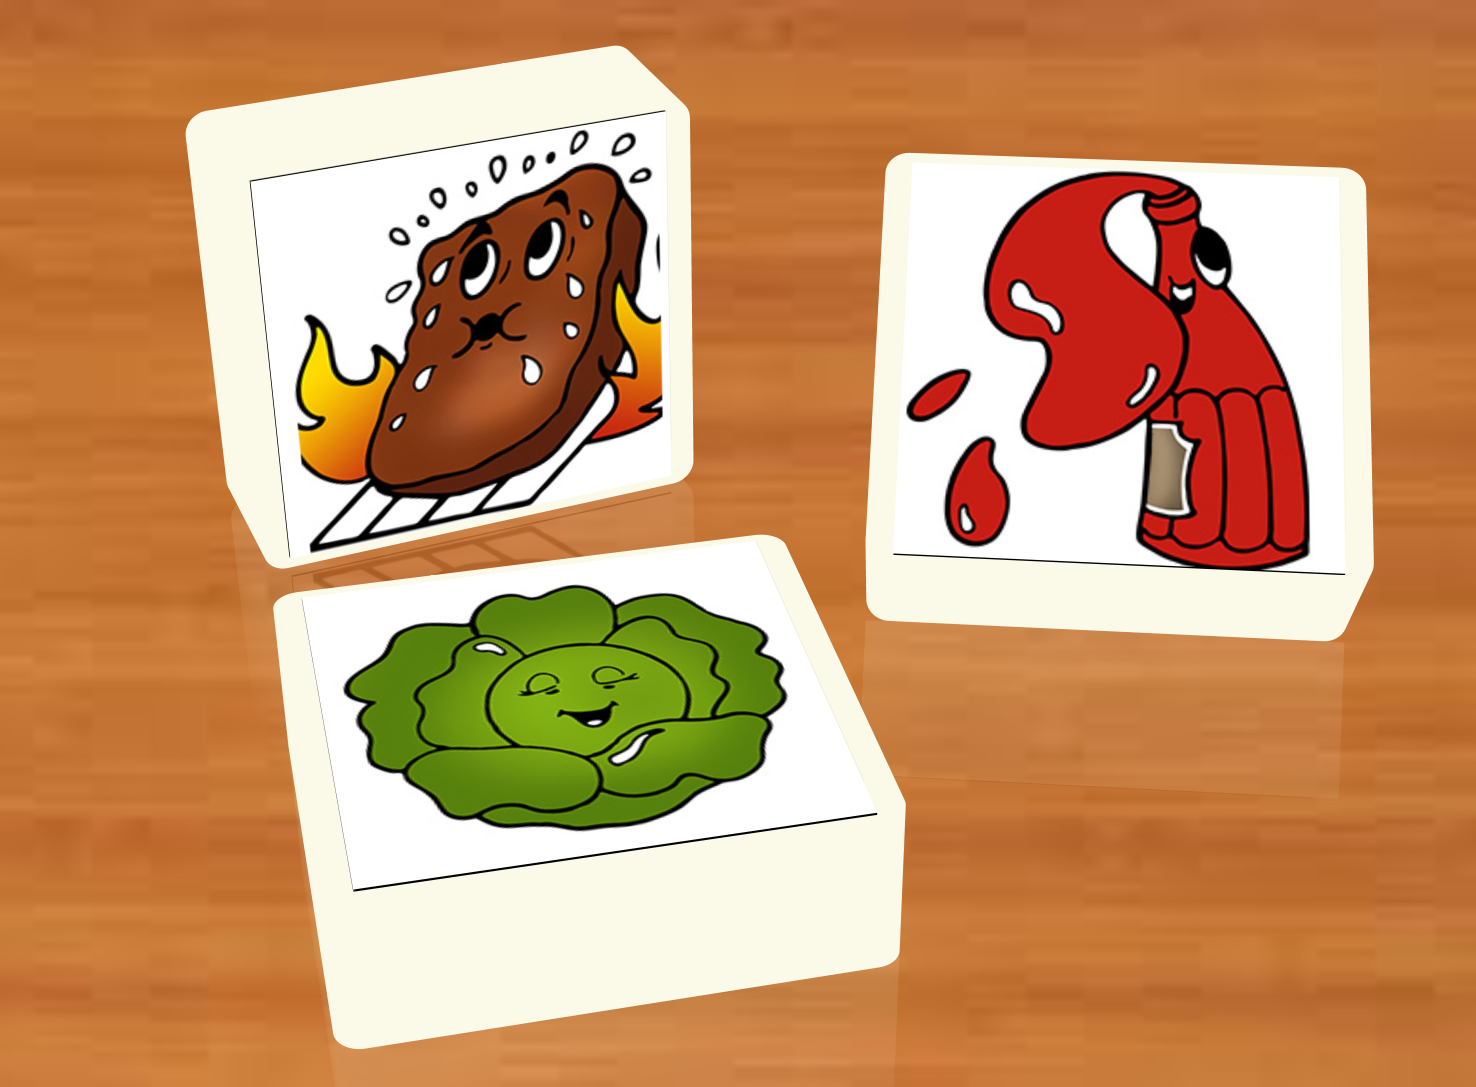
You can only appreciate the difference by looking at them before and after.
Now we have a crisp and defined vector image of our character's outline. We could paint it in Illustrator but Illustrator is not the best for this from what I read. I tried but I would need to add different shadings/gradient and Illustrator doesn't seem to be made with those kinds of things in mind so I transferred to Photoshop to complete the coloring process. I also kept copies a copy of the black outline since we will be needing them later on to recreate part of the game board.
I started by trying to match the base color and paint every section with a solid color.The artwork placed at the center of the game board was the easiest as it only contained solid coloring with no shading whatsoever but the drawings found on the board had would take more work and consideration to duplicate their look.
Once I was satisfied that I had matched the base colors to the best of my ability with what I saw on the game pictures, I started adding the different shades to the artwork paying attention to try and make sure I stay as close to the original drawings as I could. For this, I used a combination of the Dodge tool, the Burn tool and the Airbrush tool with a lower opacity level. The Burn tool was used to darken color, the Dodge tool for lightening color and the airbrush to create shading of a specific color. I isolated the part that I was working on by using the magic wand so I could only impact the specific area I was working on and tried to duplicate the original shading as much as I could so the artwork original look would still be present in the redesign.
You can see the different stage of this process down below. The image with the color removed doesn't really show it at this size, but the edge are very pixelated with leftover colored pixels against the outline just like the tracing comparison I showed you before. It would look terrible if we were to use it to recolor our artwork!

You can see the result, the first picture being the original image I was working with and the rightmost one the one that was completely redrawn/colored/shaded on the computer. Now, it might not look like much but the one on the right will look very nice and clean even if you completely blow it out of proportion or if you zoom on it very close while playing the game.
Once every element was digitally redrawn, it was finally time to transfer them to our digital game board. This is the fun part as you will see your hard work take form right before your eye!

The next part I had to tackle for this project was to recreate the game tiles and pieces. The player pieces were pretty standard and I was able to find them already made but the game tiles needed some attention to do properly. I could have loaded the artwork on a flat game token model already included in the game but where's the fun in that? Plus, I wanted it to be recreated as accurately as I could, so modelling those pieces was the way to go. Now, I must warn people that I have zero experience nor knowledge about 3D modelling so the way I worked for this part is really not the most efficient. Even without 3D modelling skill, I felt confident I could figure it out and succeed considering the relative simplicity of the part.
I tried multiple 3D modelling software to try and find the right one for a quick start and ended up using 123d Design and Blender, two free software. 123d Design seems to be more geared toward 3D printing and is linked to their shapeway 3d printing service. I usually have a strong dislike of using that kind of proprietary software that is tied to a specific service but in this specific case, I found it the easiest to use to create my model and it allowed me to export it as an .STL file which would allow me to edit it later on in other modelling software. I then used Blender to finalize things. I could (and I should've) have used Blender exclusively for this task but I found it to be extremely confusing and not intuitive at all, which seem to be the norm for professional 3D modelling software so I only used it to finalize what I couldn't do in 123d design.
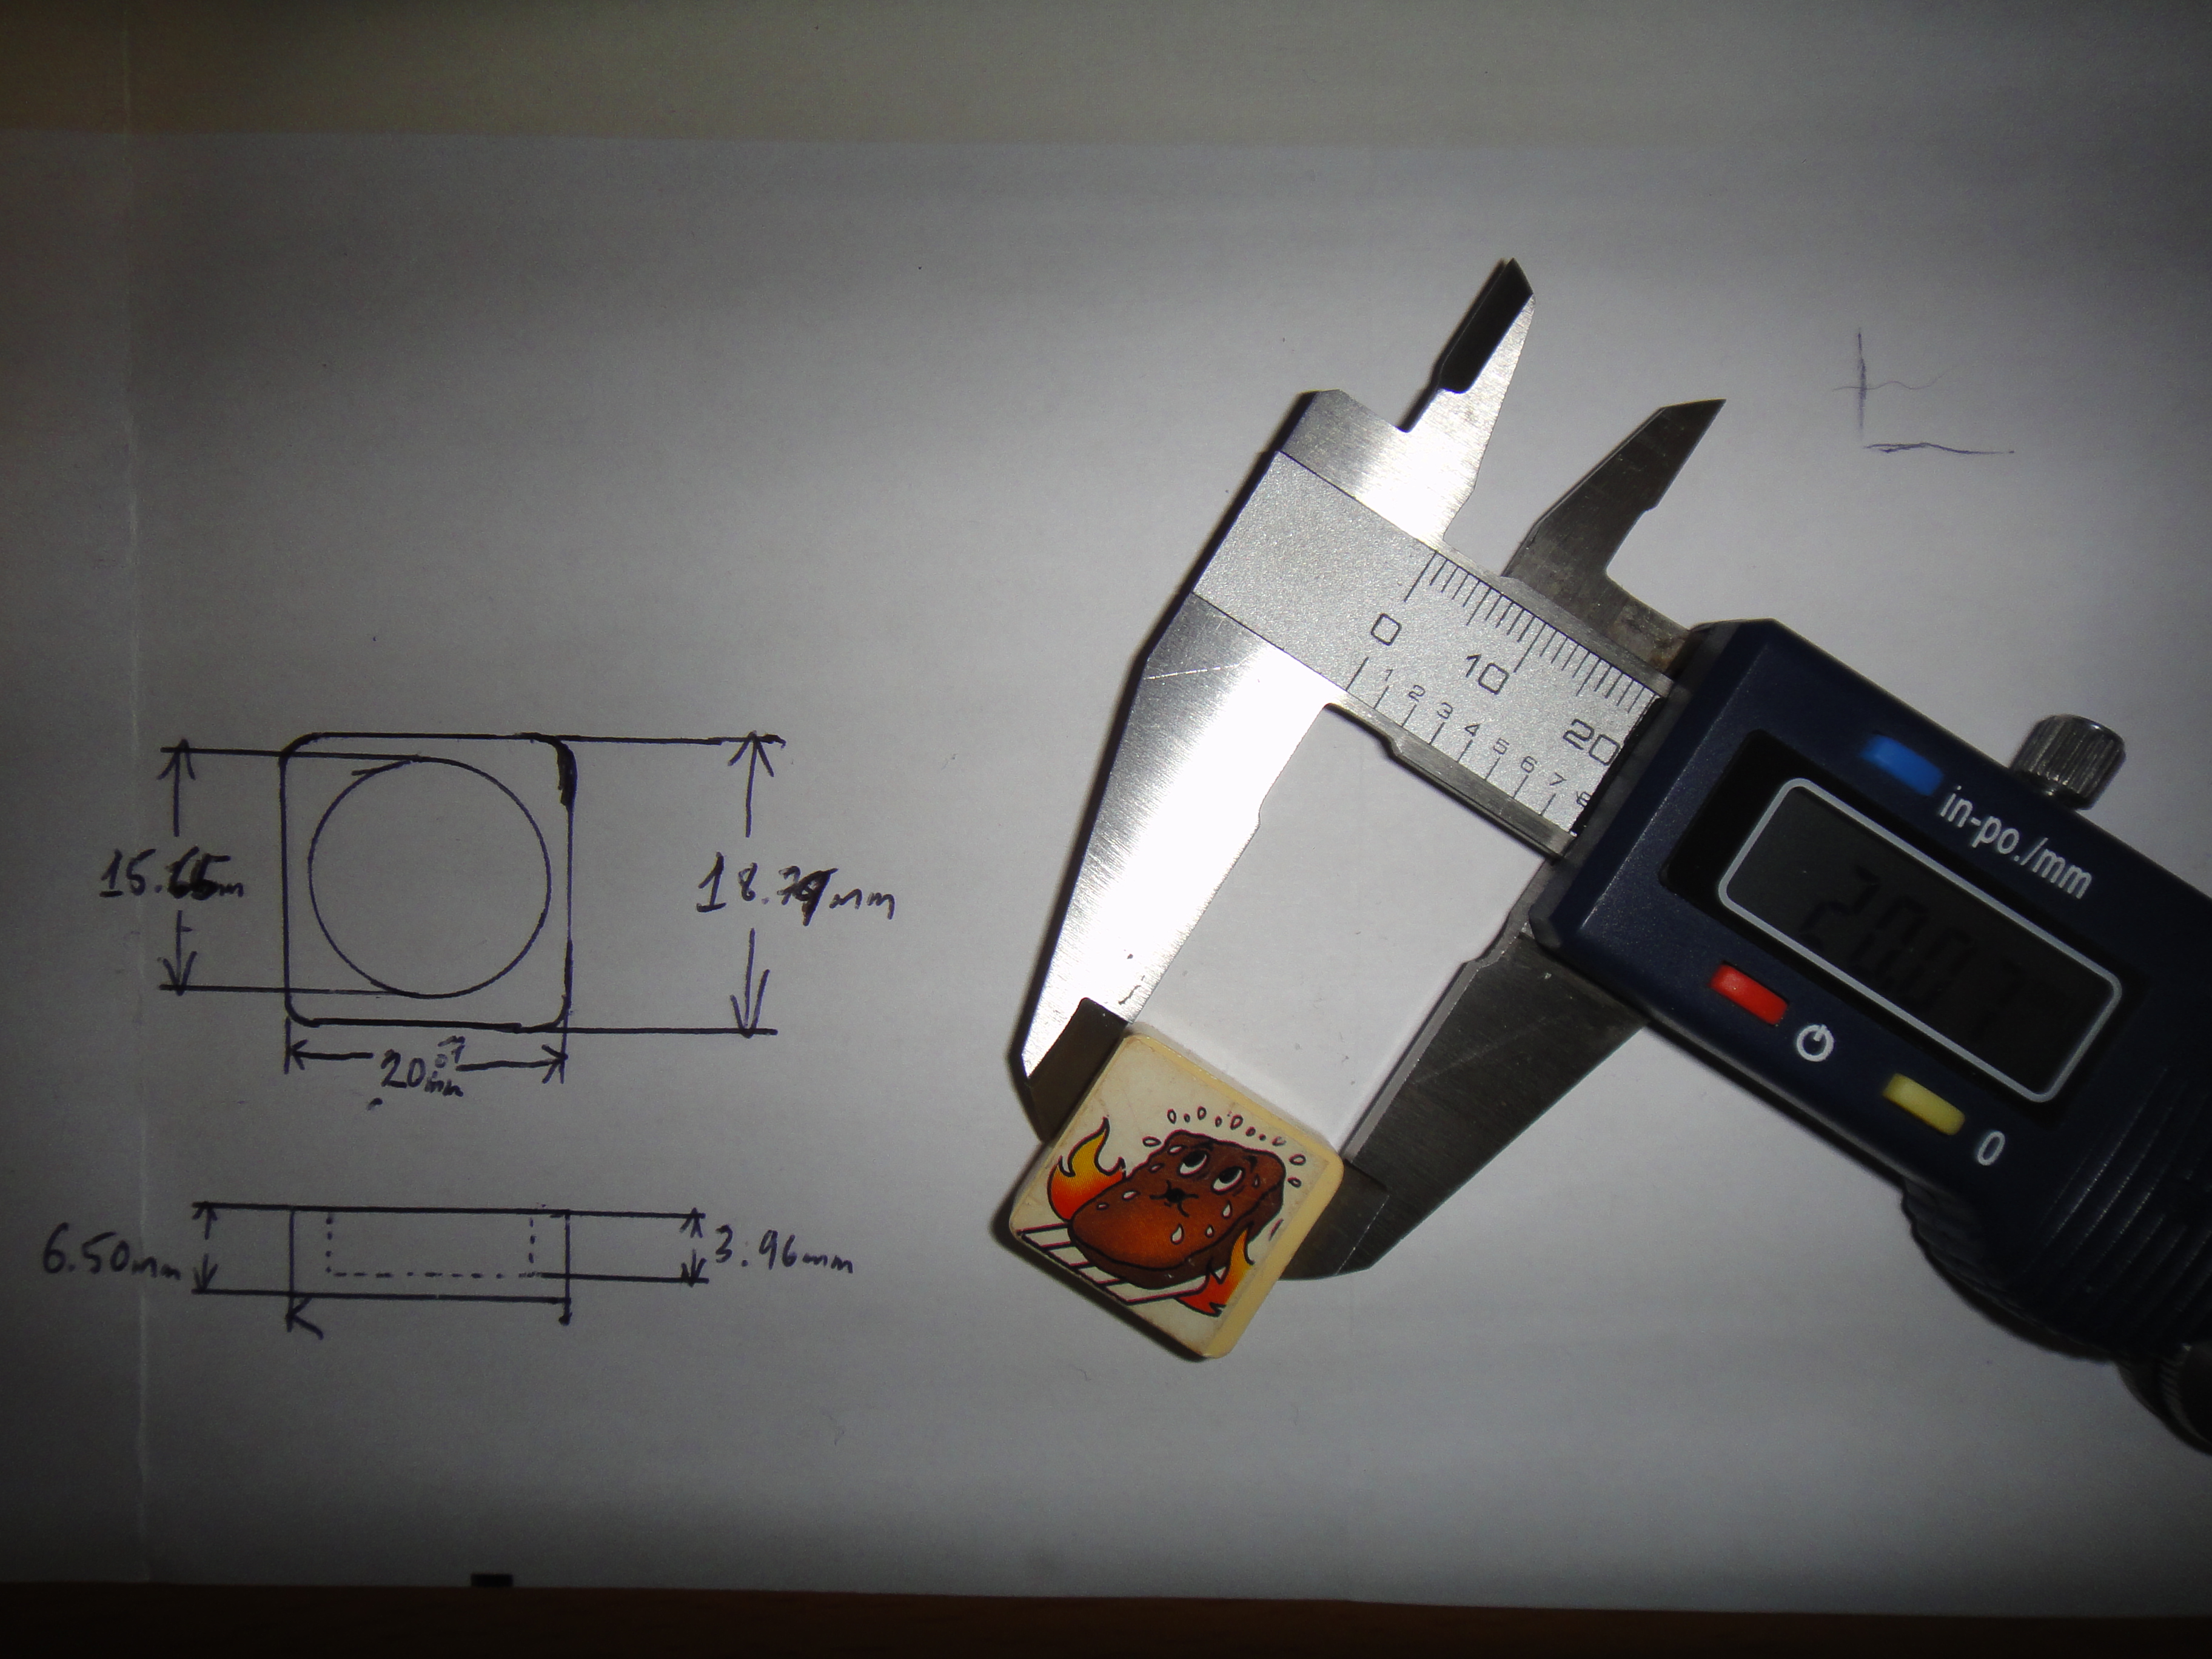
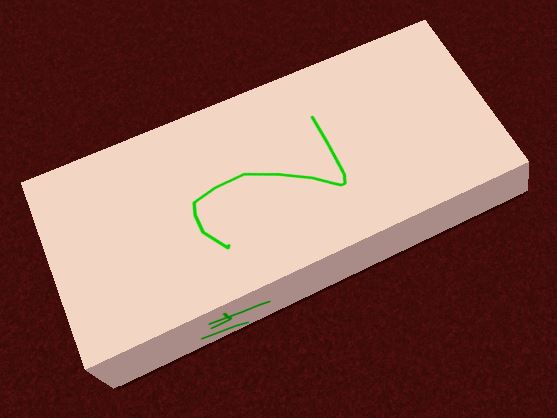
I started by taking measurement of the single-game tile I had in my possession using my trusty micrometer and used those information to create a base model in 123d design.
I then added the rounded corner of the pieces and also created the center hole of the pieces.
Once I was satisfied with my model, I needed to test and see if it was working in Tabletop Simulator. It seems that TTS only support loading .OBJ and 123d design does not let you export model as a wavefront OBJ file so I exported it as an .STL file and used Blender to create a .OBJ file. There's also a few online converter that seems to be able to convert to the different 3d model file format.
Armed with my new OBJ model, I loaded it in Tabletop Simulator, crossed my finger, and.... My model was all curvy and messed up. Huge disappointment!

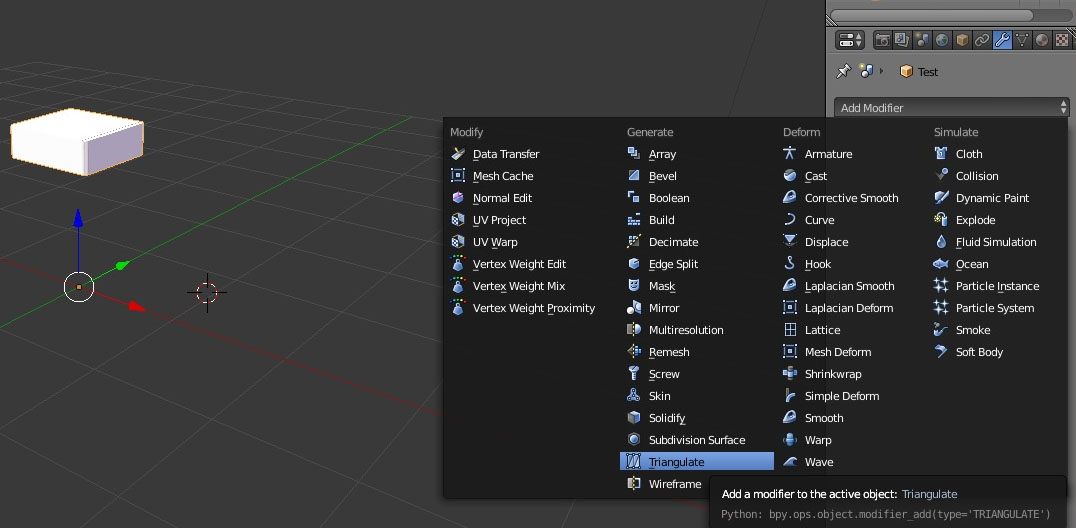
I researched and read that model need to be triangulated to work properly in TTS. So I figured how to triangulate with Blender, re-exported my model, loaded it again in TTS and.... the same issue. I tried so many different thing, exporting with a different 3D modelling software, trying to see if there was any mesh issue, etc. Nothing would work. I tried to get some help on the TTS forum on Steam and peoples had suggestions about properly triangulating and edge splitting the model but again nothing worked until someone suggested that it might be caching issues in TTS. The default option in TTS is set to cache game files so that you don't have to redownload texture for games every time you want to play them. It was my issue all along. I kept fixing the model and re-importing it in game but the game would use a local cached copy of the original un-triangulated models. Once the option was turned off, my model finally appeared in all its glory. It was way too big and was falling endlessly by the game table though. It seems that it would not take the measurement I originally entered in 123d design, it might have been lost during the exporting process. You can fix that by either scaling your model in Blender or scaling it directly in TTS by selecting it and pressing + or - but not the ones near the numpad on your keyboard, only the one near the backspace will work for this. As for the game falling out endlessly by the side of the virtual table, the issue was that the model's center point was changed during the exportation. Repositioning it in Blender and re-importing it in the game fixed this.
For those that have issues finding how to triangulate model in Blender like I did, you can find in the modifier section on the right side of the screen (wrench icon).
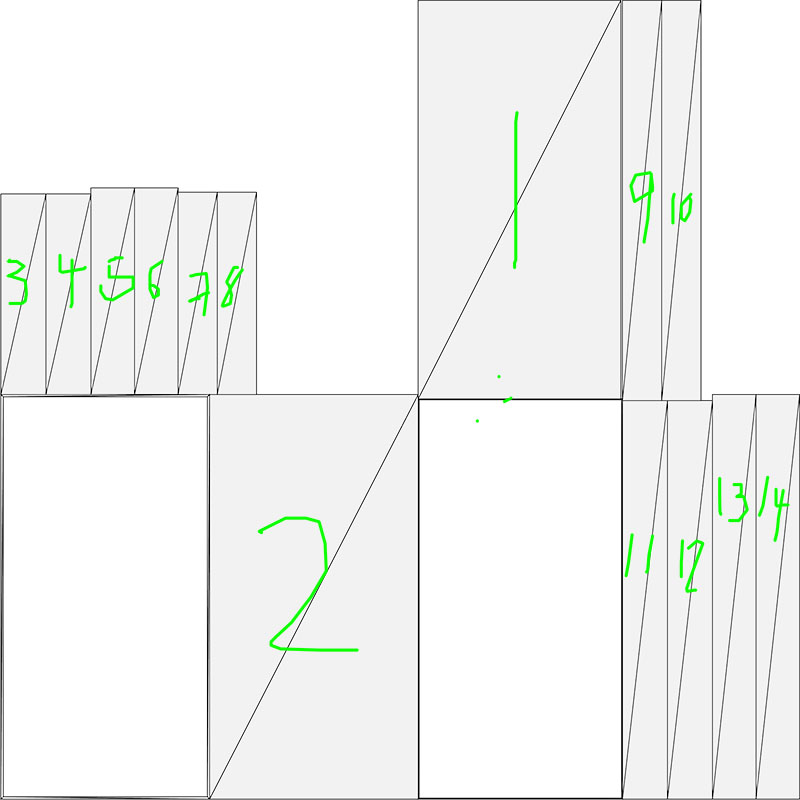
Now that we have a working 3D model, we need texture for it. What we want to do is create the UVunwrap of the model which is basically a 2D map for how the texture will be applied to your model. To do this, I went in Blender, selected my model and pressed the Shift key to enter edit mode, activated the composite view so I could see both the 3d model view and the texture windows and finally clicked on the Mesh button on the 3D view section, selected UVUnwrap and then UVUnwrap again.
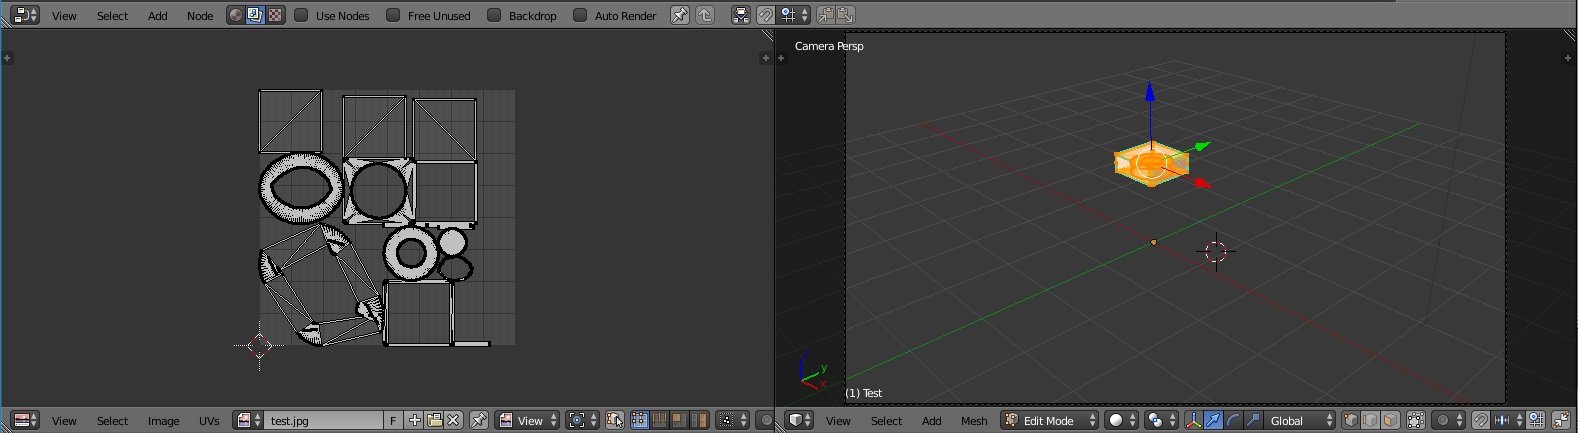
The texture map should appear in the texture windows. Once I had this, I went and exported it as a .PNG image by clicking on the UV button found in the texture windows and selecting Export UV layout. This is basically the surface of your 3D model unfolded in 2D that you will be using so the software can figure out which part of your texture part should apply to which surface of your model. We can now use this as a template to create our tile's texture. In order to figure out which surface was which, I edited the texture, put numbers on each surface and loaded it in the game. This way, I could see which part of the unwrapped texture was the top, bottom and I could then edit the texture and add our artwork using Photoshop. The following pictures show that process but for the game box model.
We could now load our new textures in TTS and see how they come up. It is important to state that, as of now, Tabletop Simulator only let you import custom texture and models with a URL, which means that you have to find a host to hold your file. This is really less than ideal and many people upload to free online file storage and they regularly get deleted.
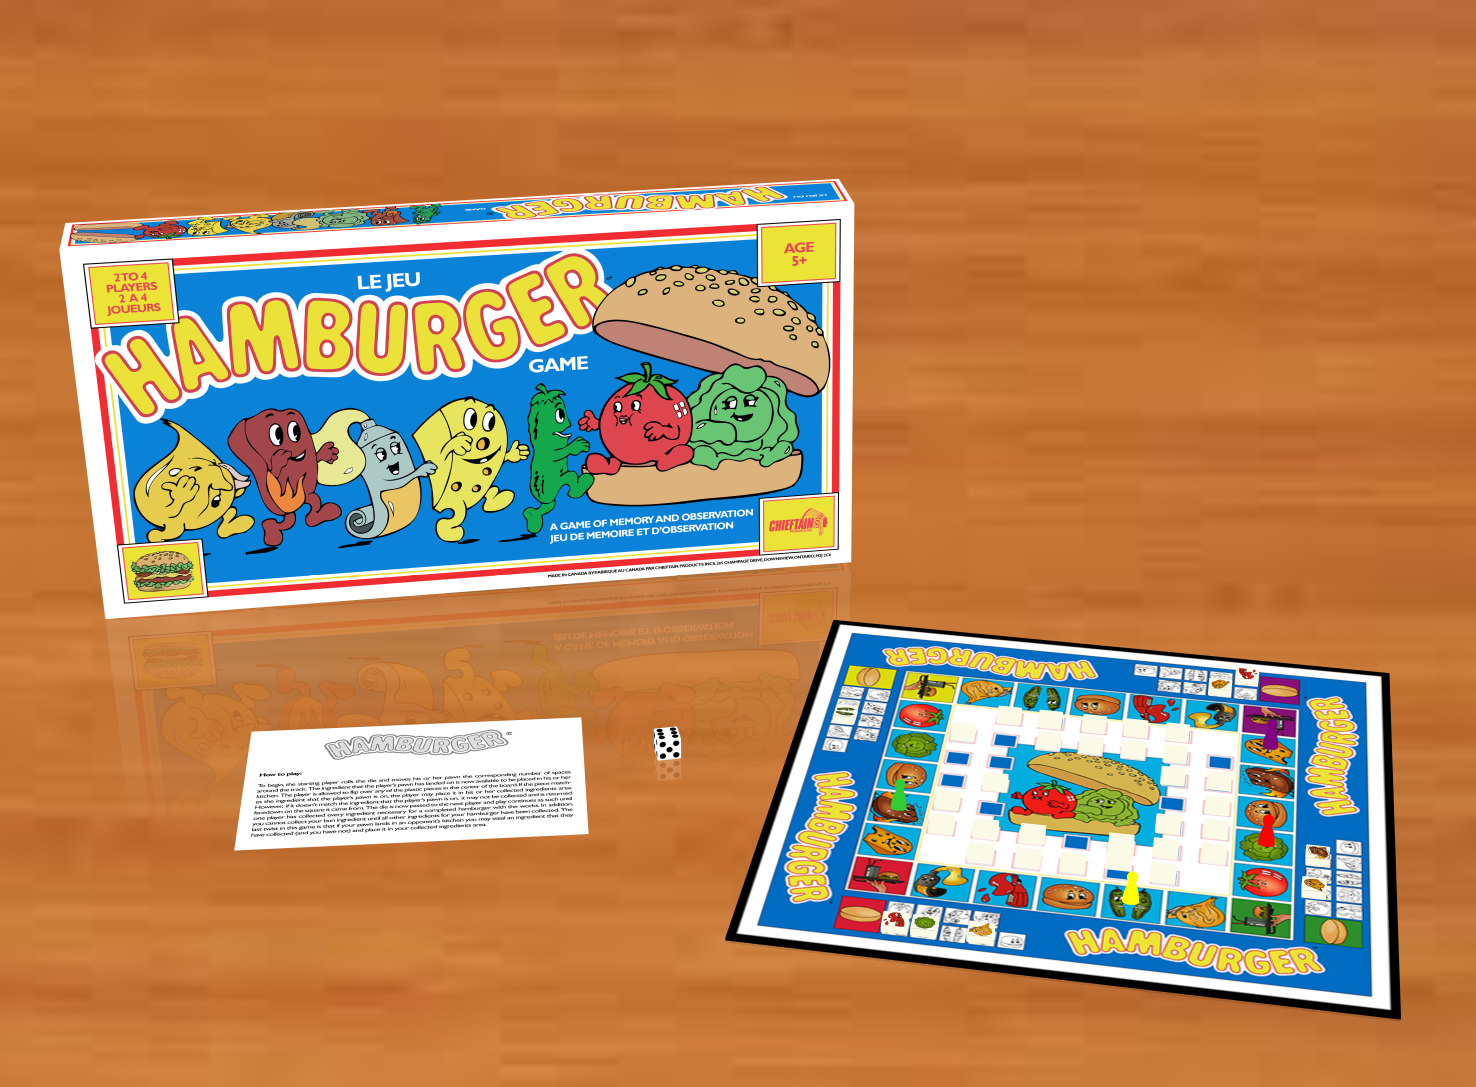
All in all, I am extremely pleased with how everything turned up and I can confidently say that this should be the best recreation of The Hamburger Game we will get for a long time:0 The only things I am not happy with (and I might revisit in the future) is the fact that I couldn't find a copy of the instructions of this game's edition and had to substitute a shorter version with text mostly borrowed from a description on Board Game Geek I must say that I enjoyed this project quite a lot and probably invested way more time in this than warranted but I can definitely say that it won't be my last board game digital recreation. In fact, it gave me a new project idea, so stay tuned for this!
And if you own Tabletop Simulator and are interested in playing the game, you can subscribe to it on Steam Workshop by clicking here!

