Sony CECH-ZED1U 3D LED TV Blinking Red Light Repair
Sony CECH-ZED1U 3D LED TV Blinking Red Light Repair
While browsing eBay for good deals on broken/defective video game console that could be repaired, I came across an auction for Sony PlayStation 24'' 3D LED TV with the infamous blinked red light defect. I remember seeing those TV for sales a few months ago, they looked gorgeous and the price was very good but I decided not to buy it after a quick search on google unearthed hundreds of complains from peoples saying their TV broke within a month of purchases. It seems that most of the TVs of that model suffered from a weird issue that turns them into huge paperweight. They would be working fine one day and would be unable to power on the next. The power light would turn blue for a few seconds, then turn to green for a second or two and finally start flashing red without the LCD lighting up at all. Sony never really acknowledged the problem and quickly discontinued the model. I went a researched the issue and was surprised not to find much information about it except for numerous unhappy customers sharing their blinking red light story. It seems everyone had their theories on what might be causing this issue but no one with electronic experience seemed to be looking into this (or at least sharing it). Not wanting to be stuck with a non-working TV, I pushed back bidding on the auction until I could have a better understanding of the issue. I then came across something peculiar, it seems some ebays store were selling TV repair service for that specific issue. Not only that, they were also selling EEPROM chip for that particular TV set. They were selling them sometime for over 30$, which is a total rip-off. With that information, I was able to narrow my search considerably and ended up finding a long thread about this issue on a forum called Badcaps where I got confirmation that there was a strong chance that the issue was caused by this EEPROM chip.All I really needed now was a binary of the code that was on that memory chip before the TV would go blinky. It was frustrating because the thread was long and the only time someone seemed to have copied the content of working chips after getting help from the other member, they would suddenly disappear from the thread and no binary was shared with the others. This is a behaviour I really despise and definitely not the first time I saw that happen. I suppose they suddenly had dollar signs in their eye and thought they could sell preprogramed replacement chips on eBay like the other few sellers were doing. Now, there is nothing wrong about trying to make a few bucks that way, but at least help out the other peoples that were in the same boat as you and tried to help you out. I was approaching the end of the threads and my chance of finding what I needed looked pretty hopeless until I came across a reply from a user called Zhaojun297 who came out of nowhere with the binary file from the EEPOM chip and various other information for diagnosing those TV. Even more awesome is the fact that he seemed to have registered to the forum just to share that with the other users.
Armed with that information, I was ready to try my luck. Unfortunately, I lost that TV and was pretty bummed about it. That is until I found out that the same seller had 2 other TVs just like that for sale with the exact same issues. I managed to get one for about 27$ + 25$ shipping and about 9$ provincial tax. I then tried my luck and won that one too for a pretty good price too. Second tv set ended up costing me 32$ + 25$ shipping and about 9$ tax. Considering that I was already fully equipped with everything I would be needing if the issue turned out to be the EEPROM chip, I thought it was well worth the investment.
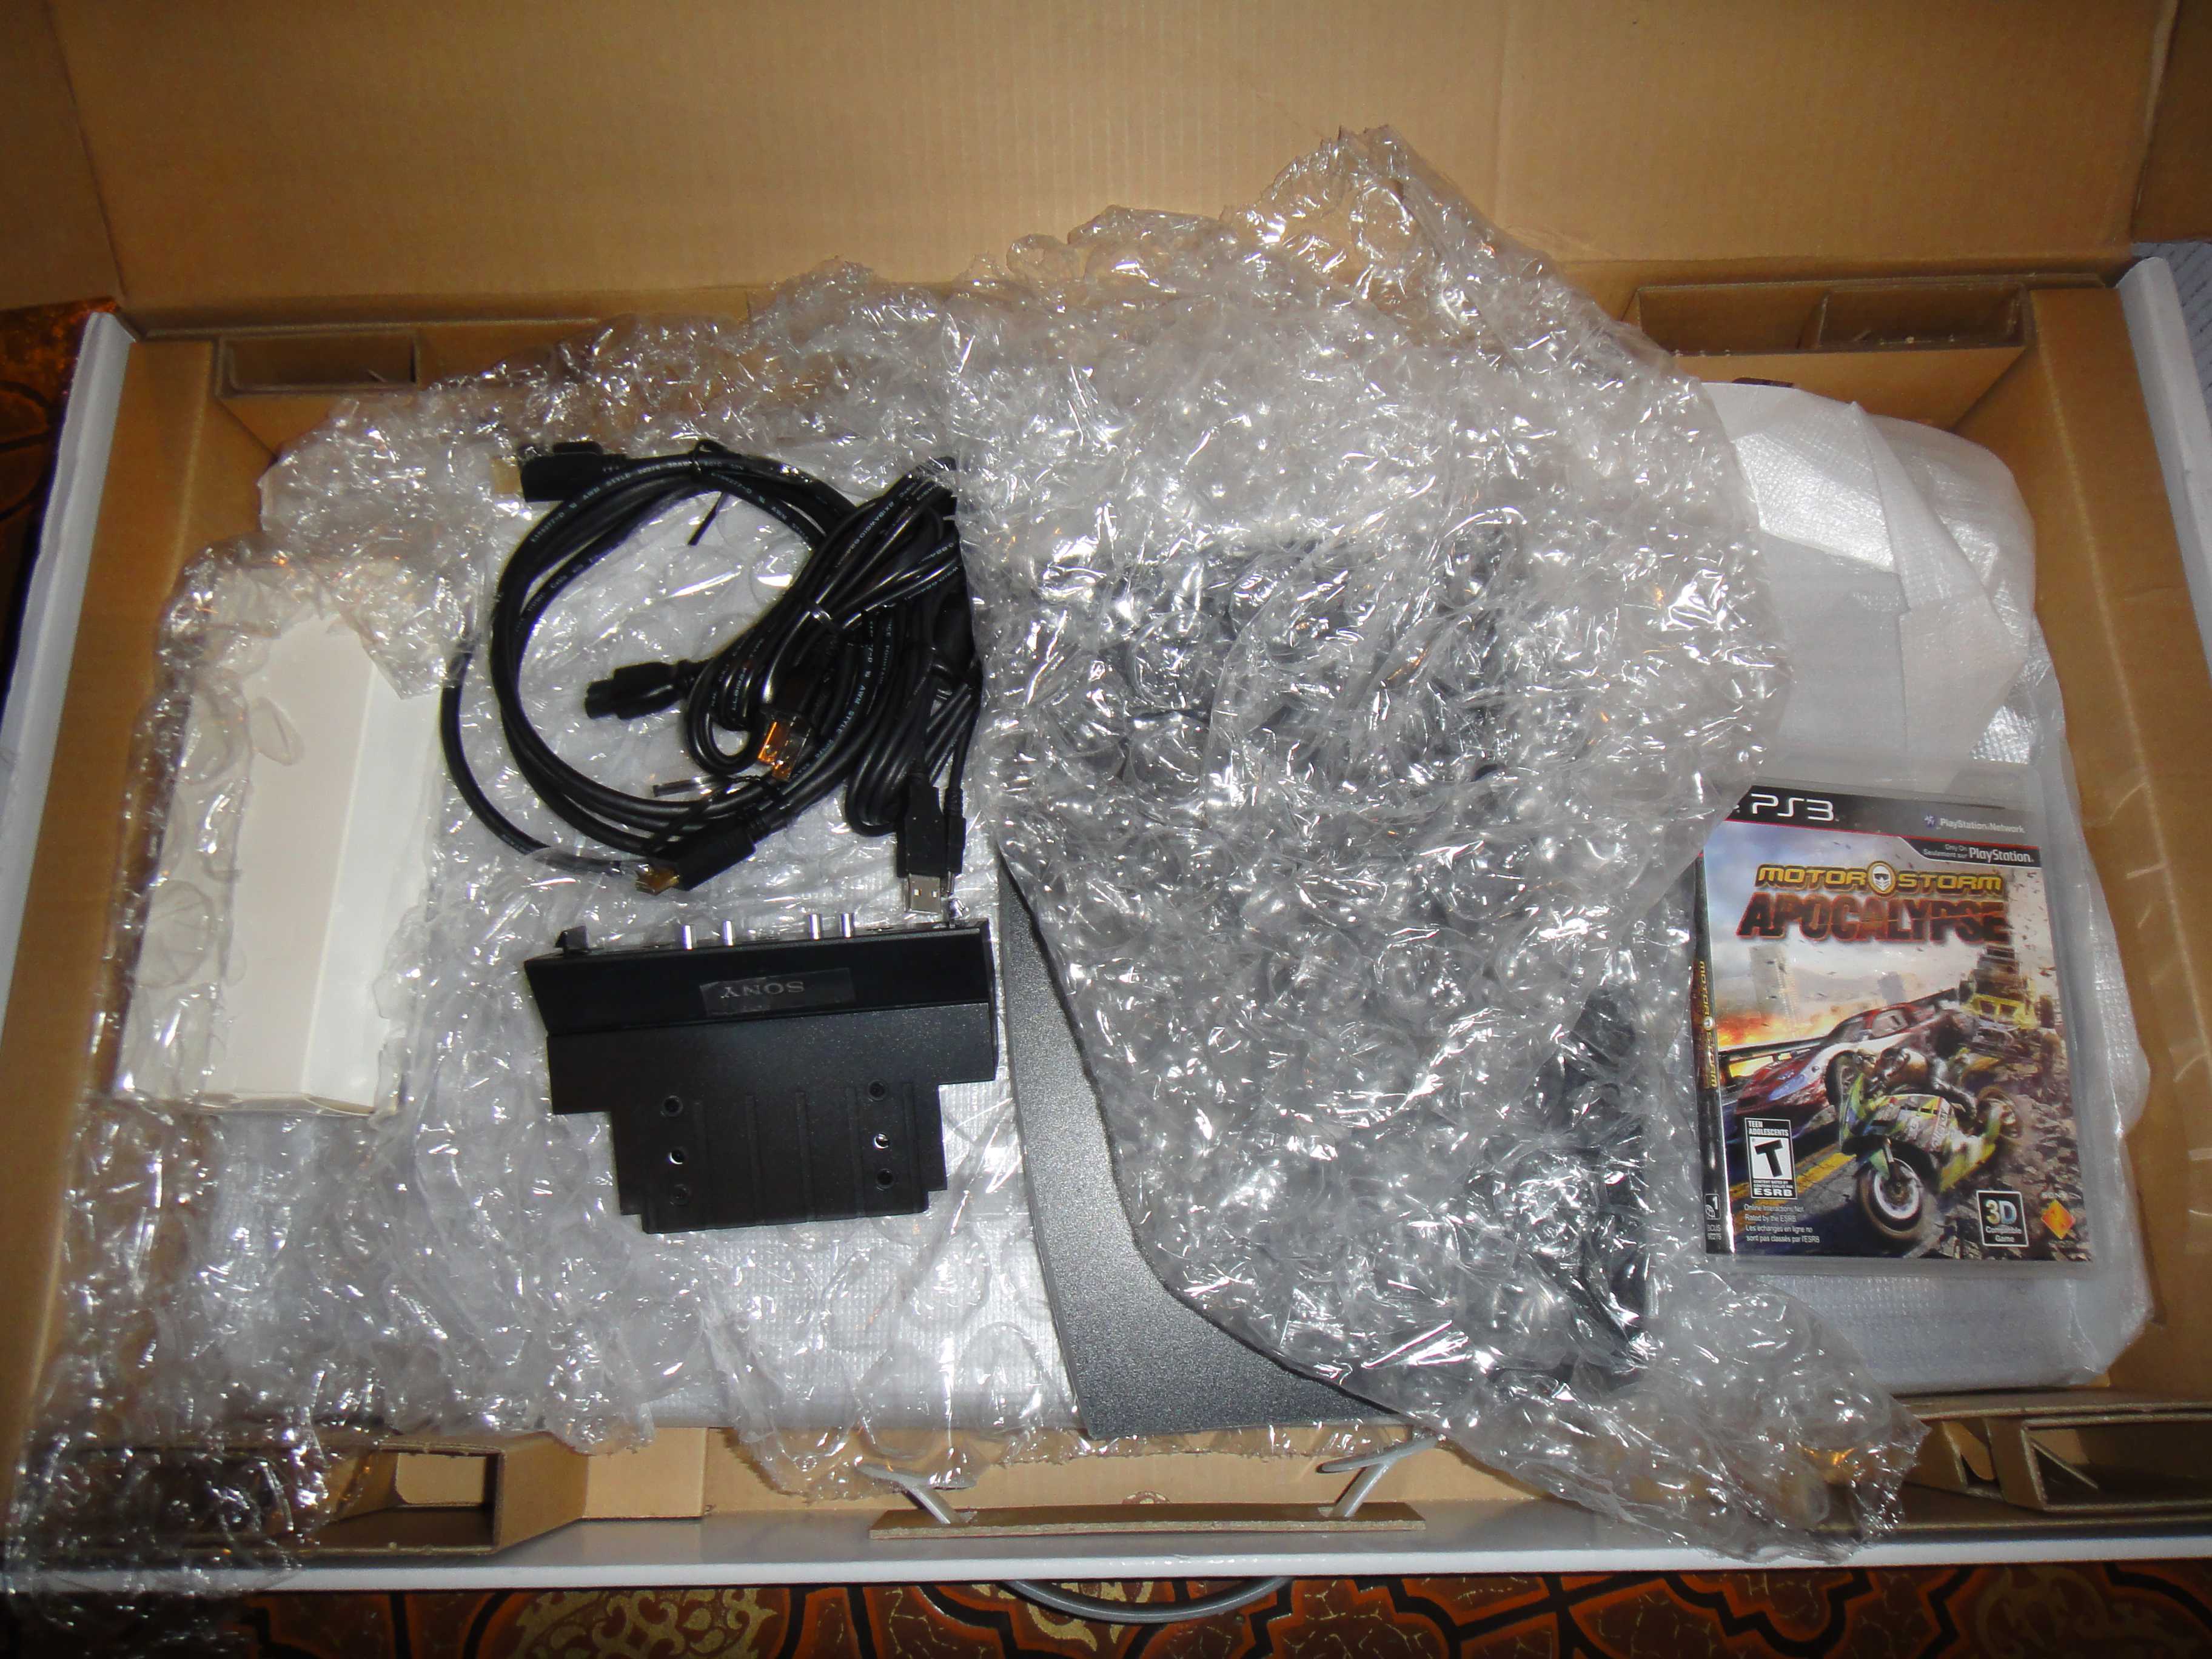
I received the two TVs and they were really in perfect shape, with some protective plastic still in place and even came with the 3D glasses, cables and a PS3 game (Motorstorm Apocalypse)! I was really pleasantly surprised, not bad for a TV I was expecting to be second hand. I immediately got to work on one of them.
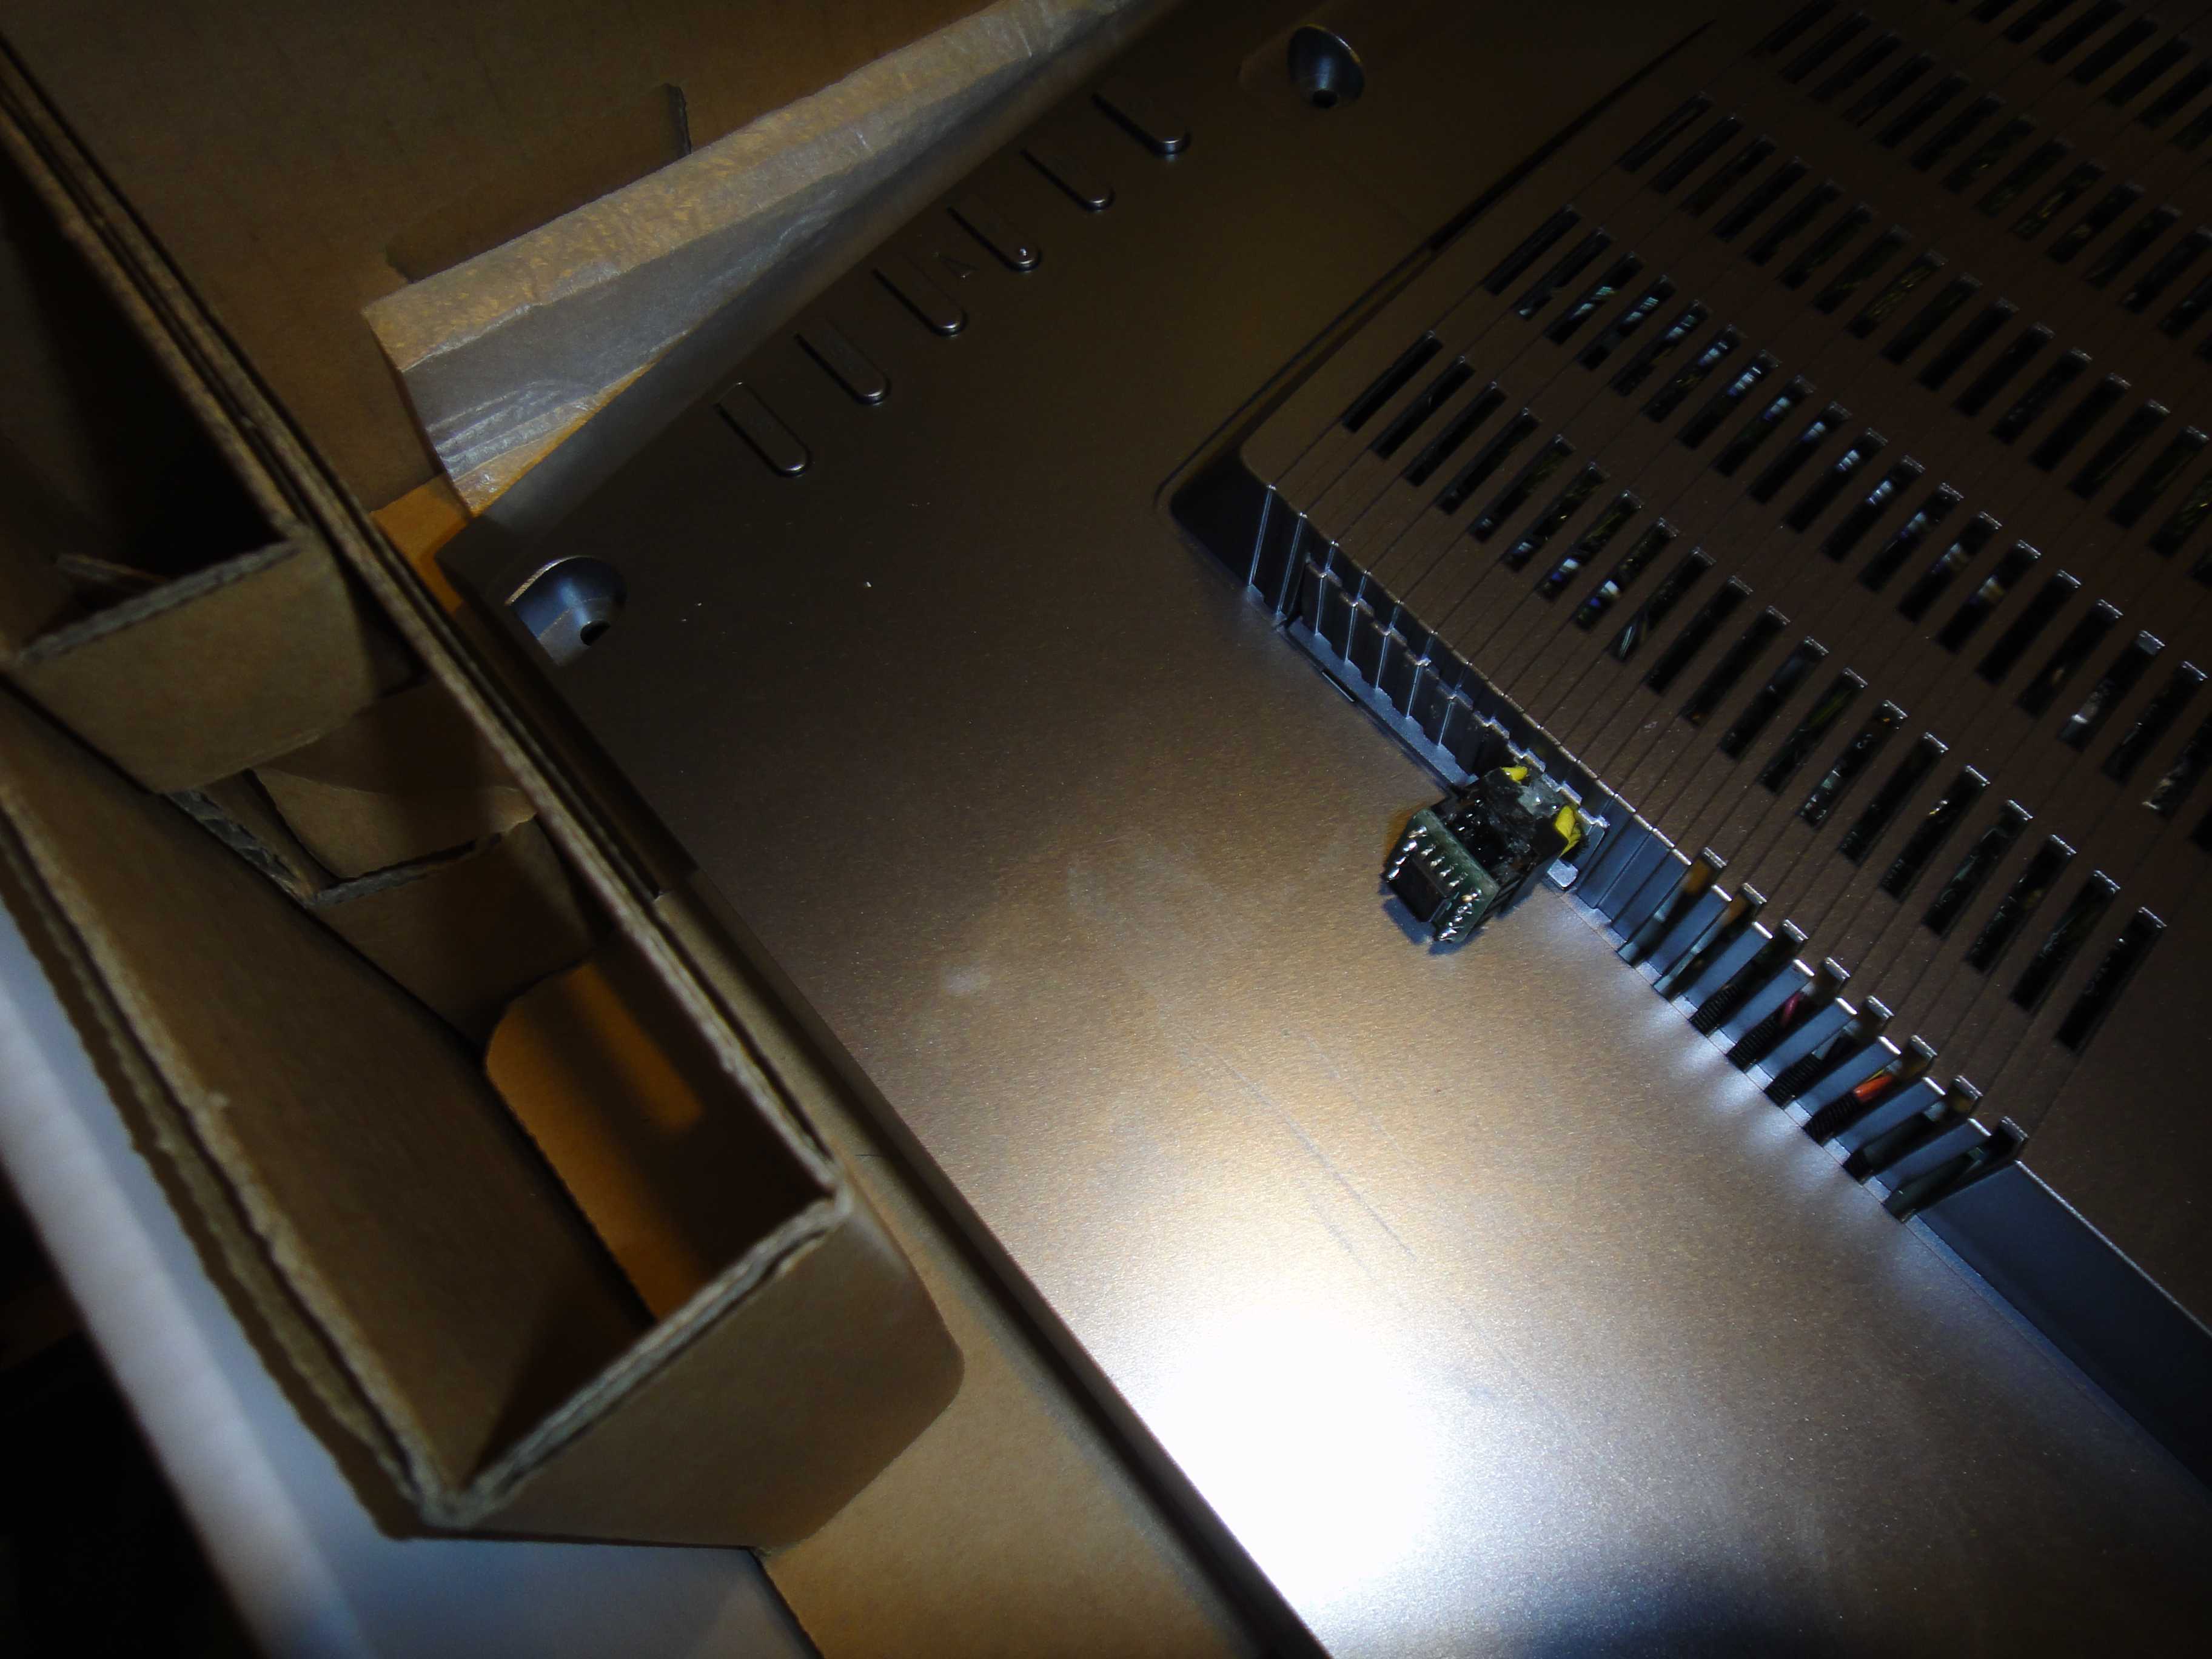
The chip in question is a 25L6406E EEPROM (can also be replaced with a MX25L6408E). You can locate it by looking at the silkscreen of the PCB, it's labelled as U4. It is pretty easy to access, all that is required to do is remove the TV backplate. I wasn't sure if the chip would still be usable since nobody was aware of what was actually causing this issue and the few persons that tried to read the EEPROM chip taken from a defective TV reported not being able to ID the chip. Since I couldn't be certain that the chip would be completely dead or if those reports were inaccurate and just due to first time IC programmer users, my first order of business was to de-solder the chip. It might have been possible to read/flash it in circuit but I decided to take the sure way and remove the chip from the PCB for further analysis. I then did what I usually do when I desolder SMD chip and covered the surrounding area with Kapton's heat resistant tape to help give a little bit of protection to the adjacent components and also to prevent the really tiny SMD resistors and capacitor to fly off by accident. Trust me, it happened to me too many times and it gets really problematic figuring out what flew away without the schematic or a second circuit board to compare.
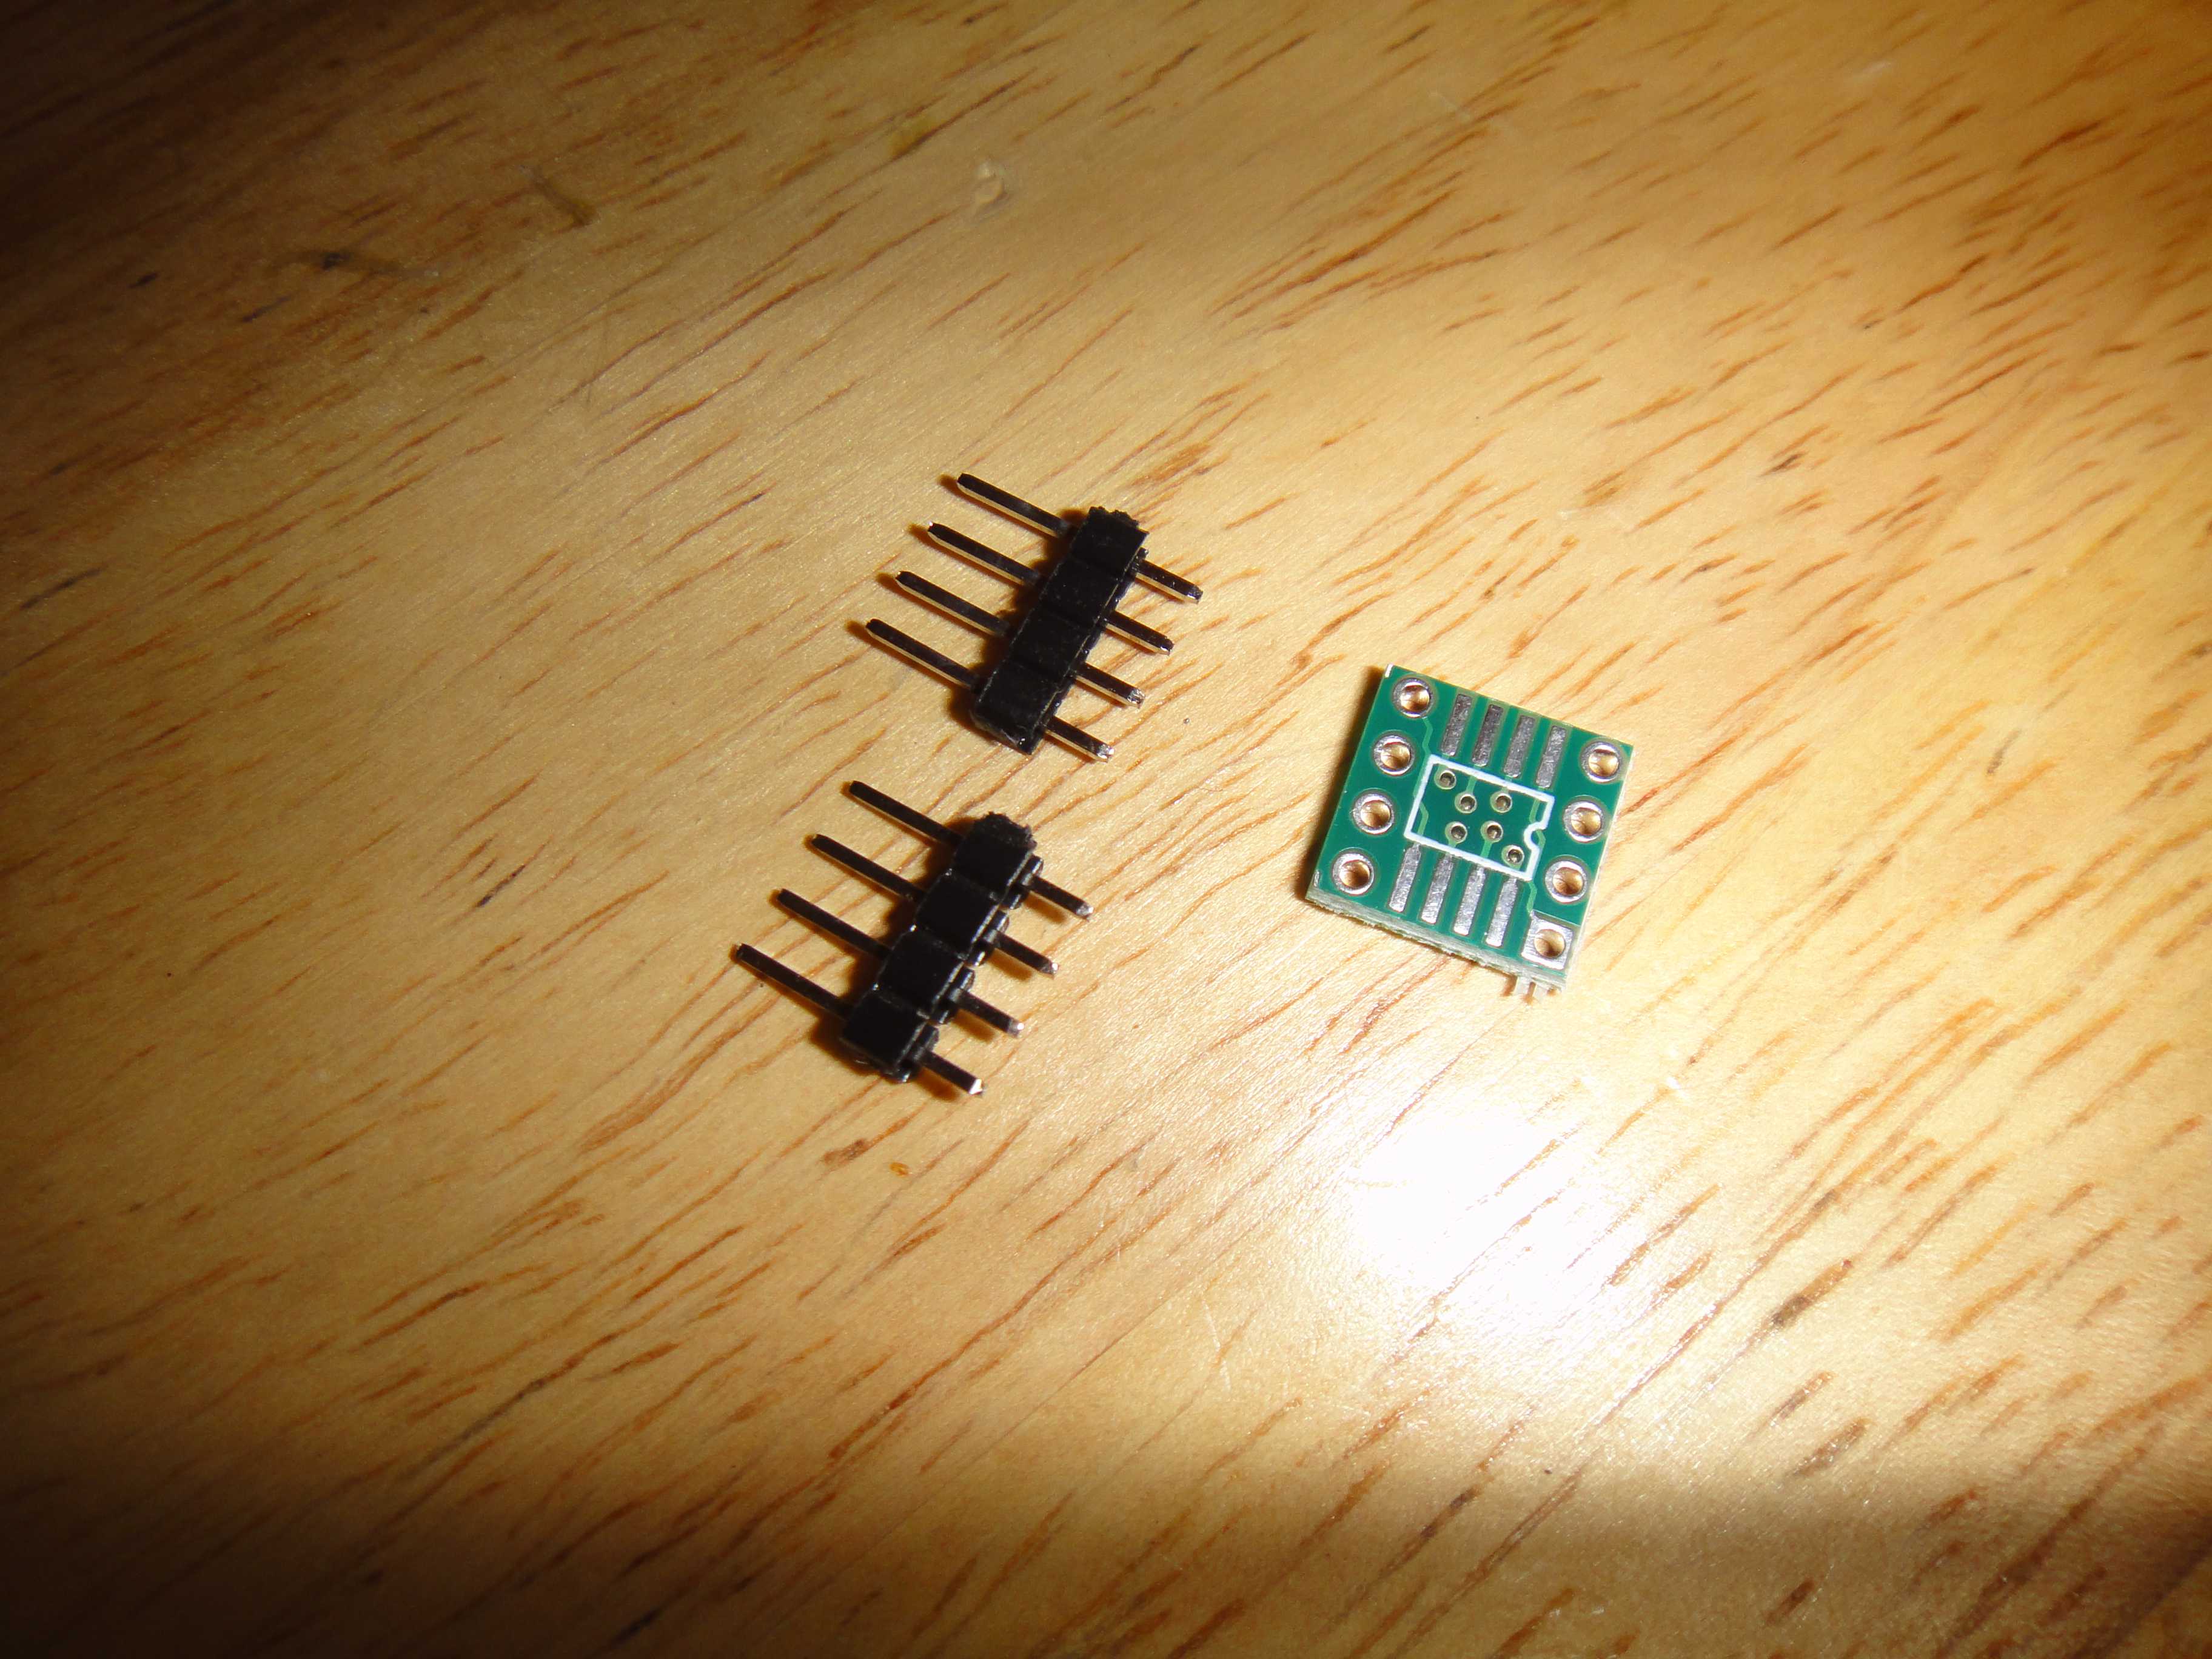
Once the IC was desoldered, I needed a way to read the chip in my universal programmer. There is a couple of ways to achieve this if you do not have the proper programming adapter. The easiest would be to just use a SOIC to DIP adapter like this.
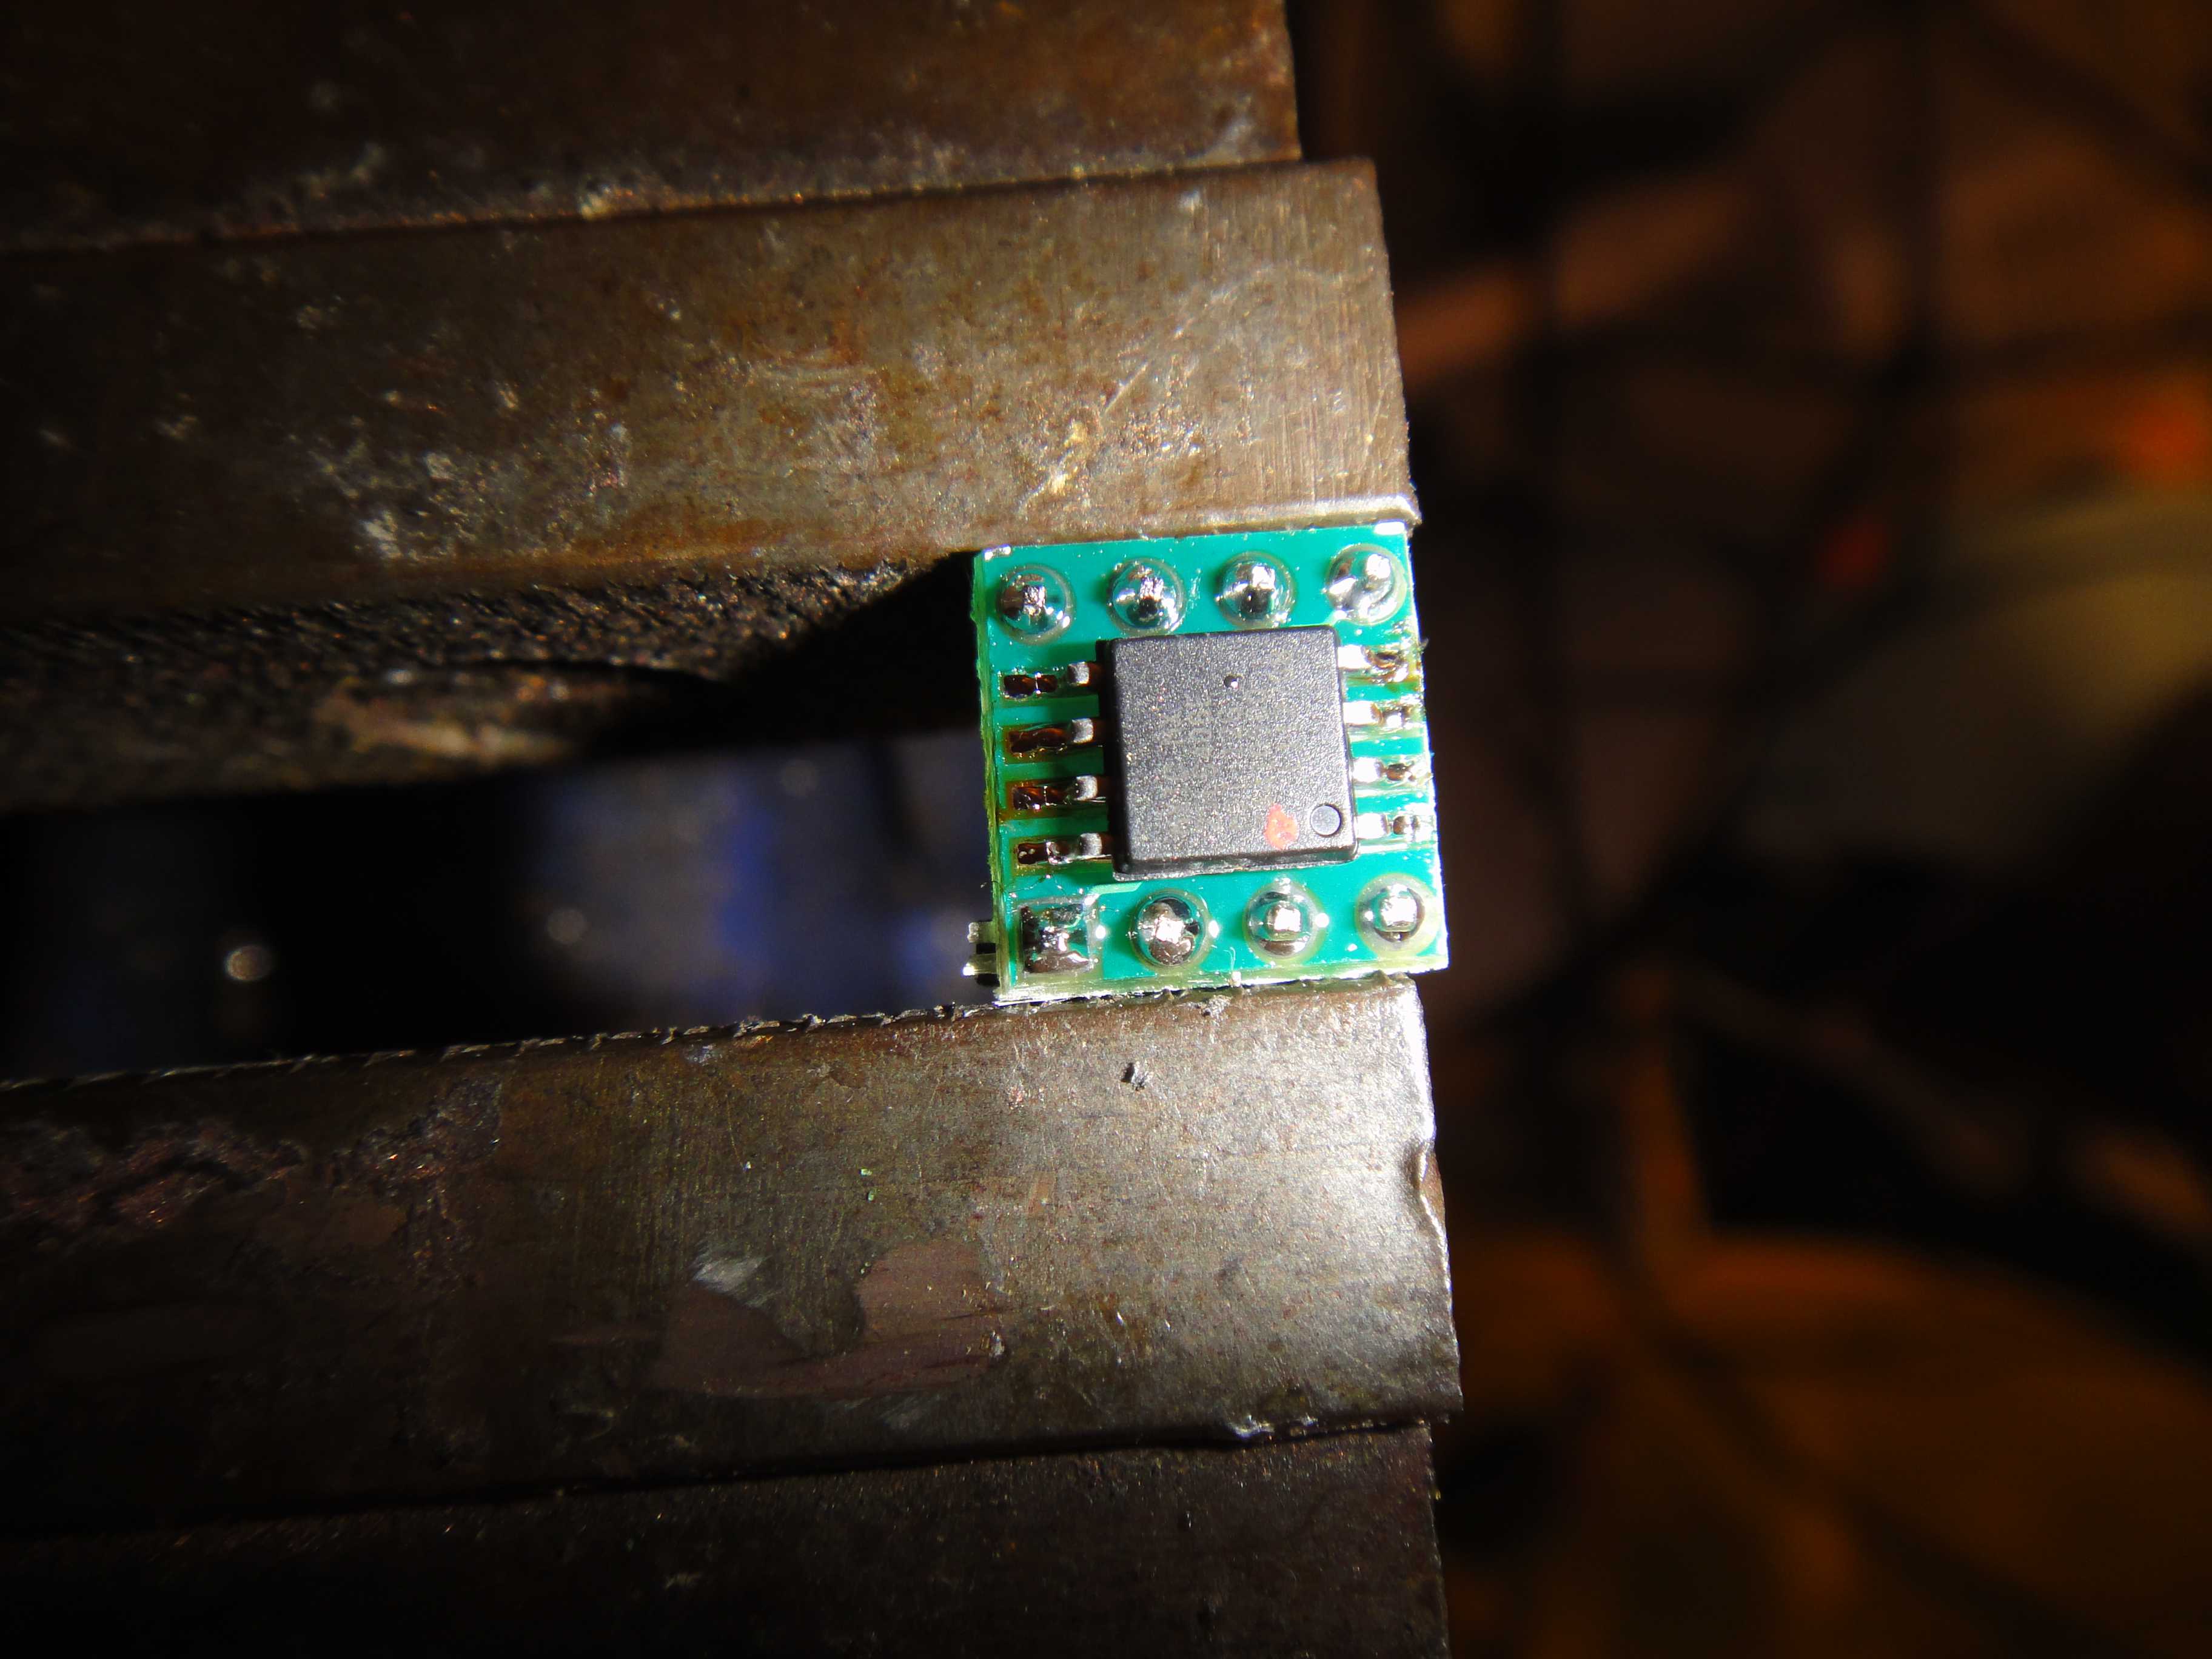
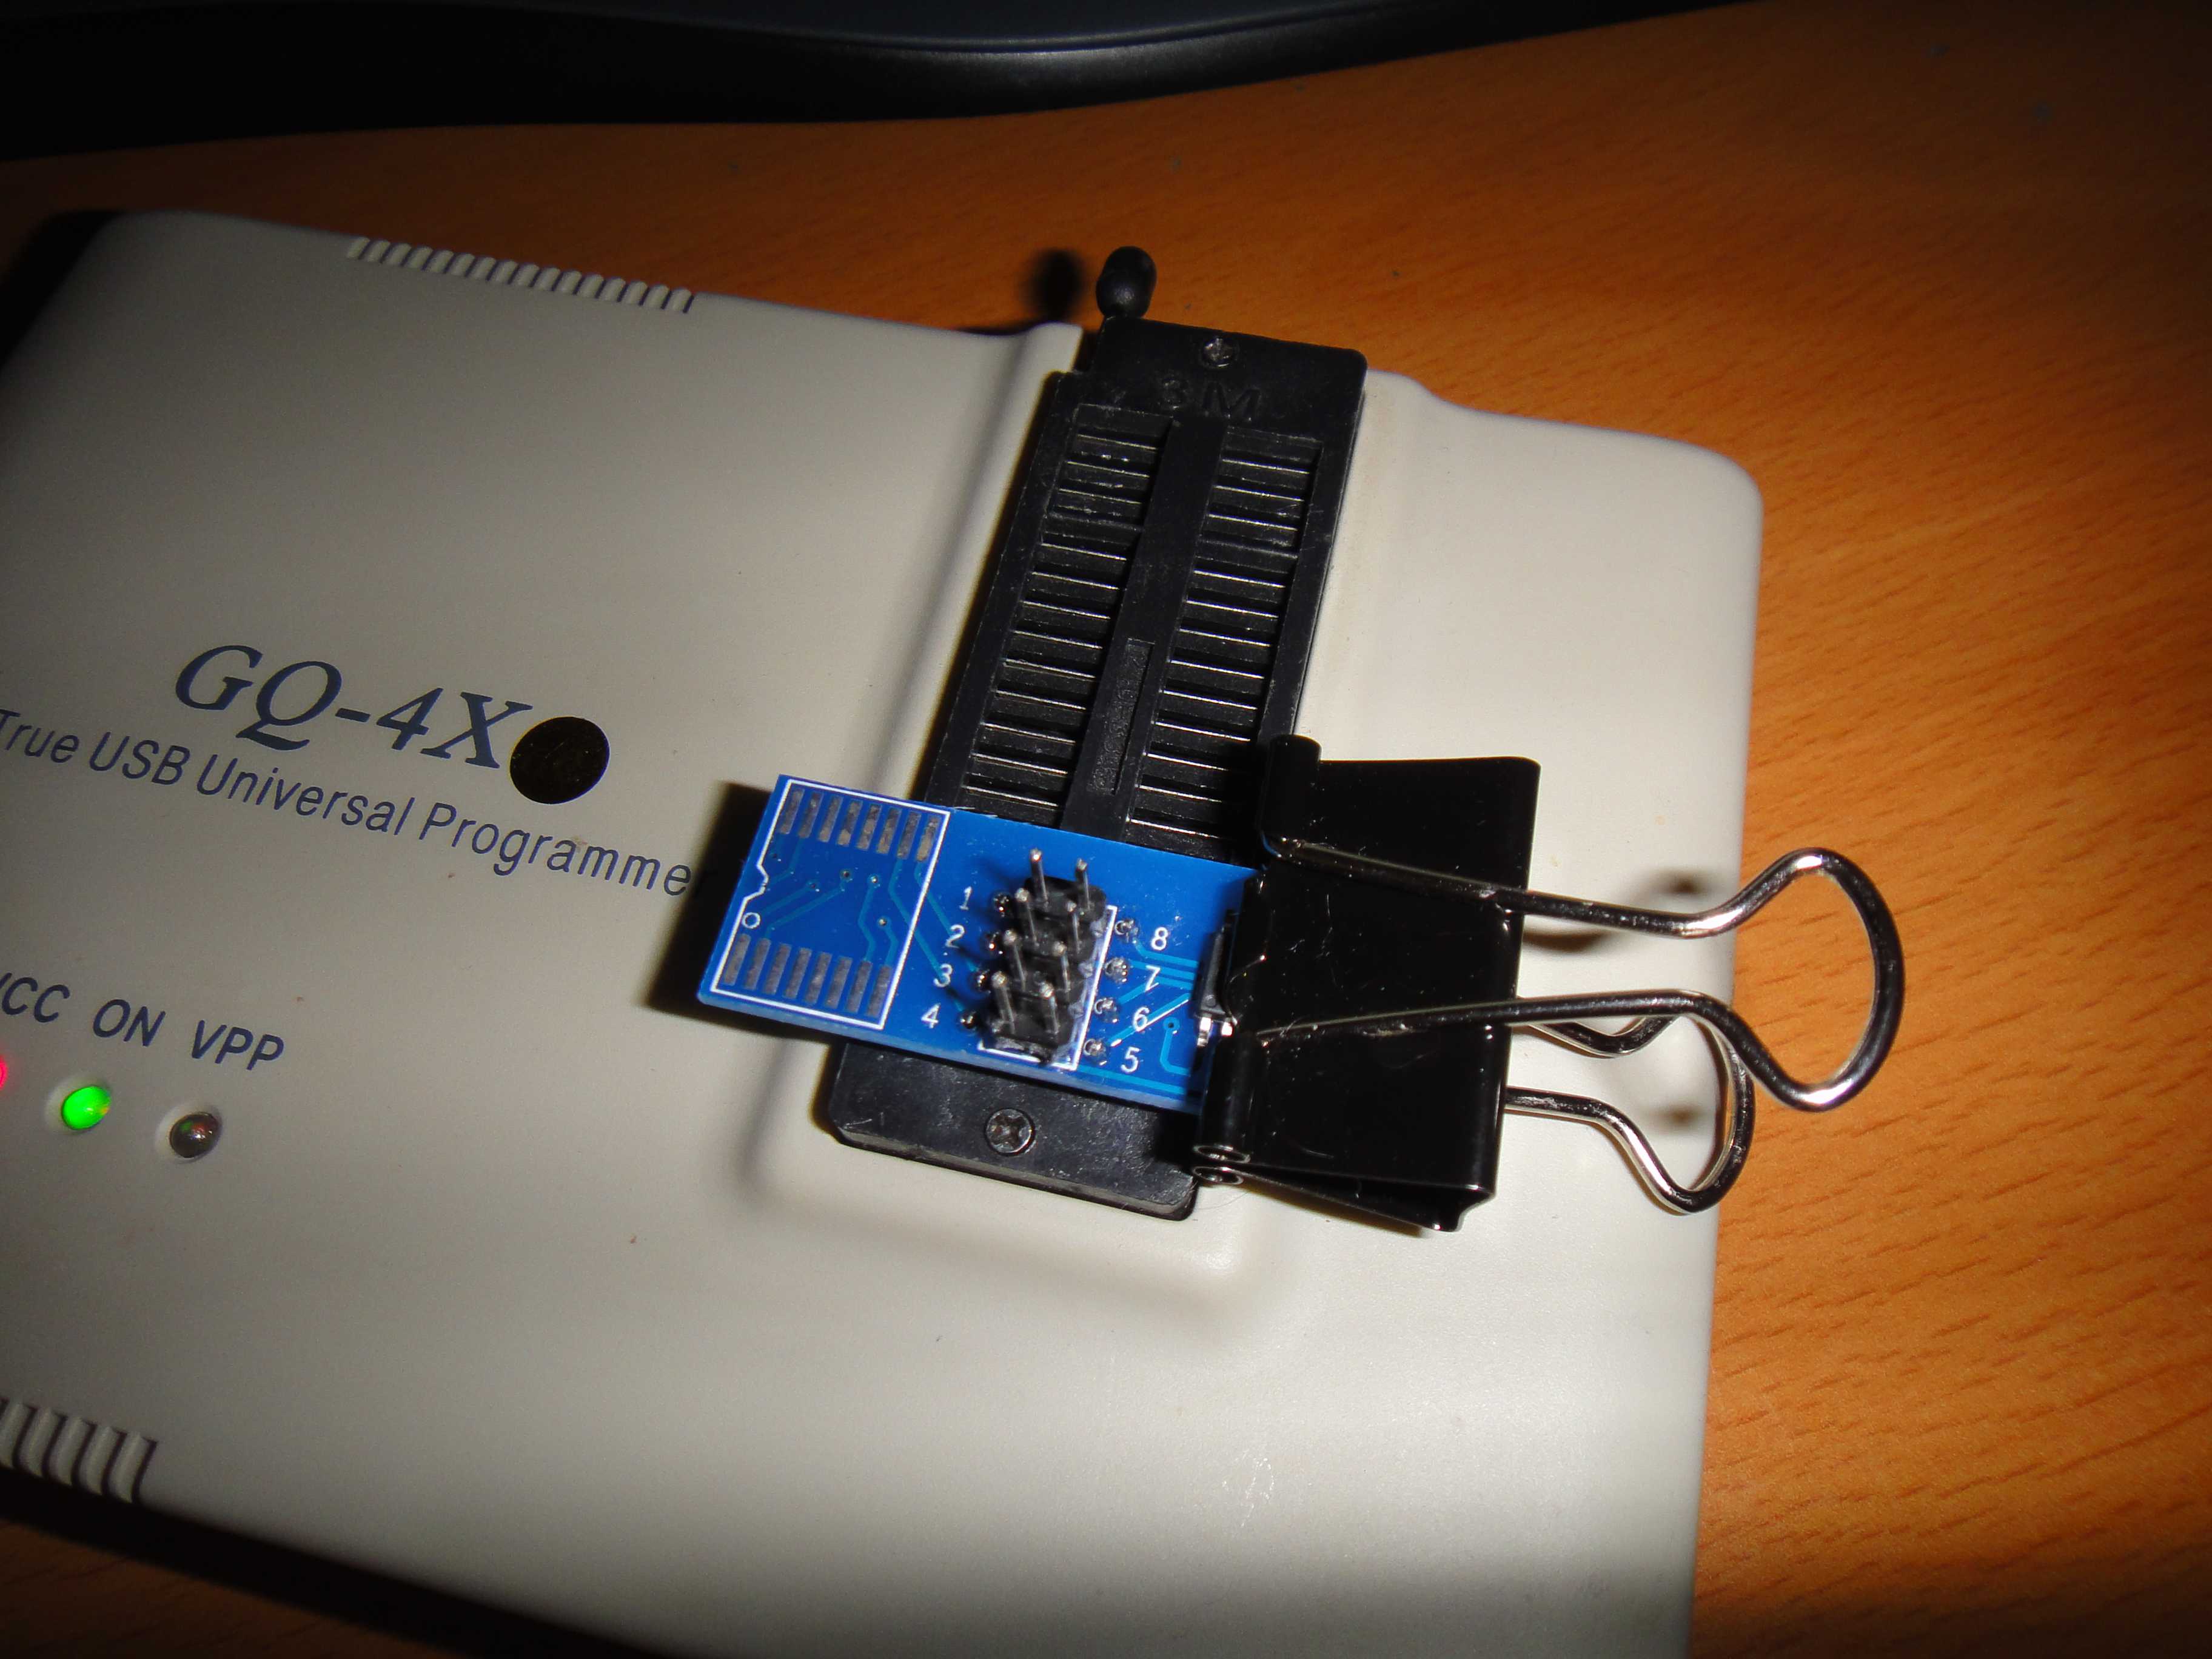
The chip was then ready to have all it's secrets revealed by my trusty GQ-4X. I was curious to confirm what some users had been reporting about the EEPROM no longer being readable once the blinking red light issue appeared. For those using the GQ-4X, you'll notice that once you select MX25L6406 as your device, the software indicates that you need an adapter to have it supported. Well, no SOIC adapter is needed if you have a small SOIC to DIP PCB like I am using. Just insert it like on the picture below. You could even temporarily solder short wire to the pin of your EEPROM and connect them to the ZIF socket of your programmer if you're rushing and do not want to have to wait to receive your PCB adapter.
Those little PCB adapter and pin headers are very cheap on eBay (and pin headers are super practical to have anyway). Only issue with that is that you need to de-solder the chip from the PCB once you are ready to re-solder it in your TV. You could always hold it in place with your finger but those EEPROM takes a while to flash completely and your hand is likely to get tired midway through the procedure. Another practical trick is to use a paper clip to hold the chip in place while reading/programming it.You also need a SOIC to DIP PCP PCB adapter but you won't have the added trouble of soldering and de-soldering the chip on the adapter.
The paper clip method look a bit ghetto, but it work and cost next to nothing. Plus, I love when I can solve a problem with what I have lying around for free. But if you plan on having to read/write other chips with the same footprint, I would advise ordering a programming clip on eBay. They are pretty cheap, I got mine for about 9$ shipping included (once again, thank you China X) ) and will make reading and flashing that type of IC a real breeze.
The chip was not dead and the programmer gave the correct chip's ID right away. That is good news as I had originally bought a few 25L6406 EEPROM chip which can be used as a replacement for the original 25L6408 used on this main board but since the original EEPROM chip seemed to be in working order, I could just reuse the original IC. I erased the chip and made sure it was completely blank with a blank test and then loaded the binary file that came from the working TV set that I found online and re-flashed the content on the chip. I chose to use the small SOIC to DIP adapter because I didn't have the programming clip at that time and also because I was planning on socketing the chip later on, more on that later.
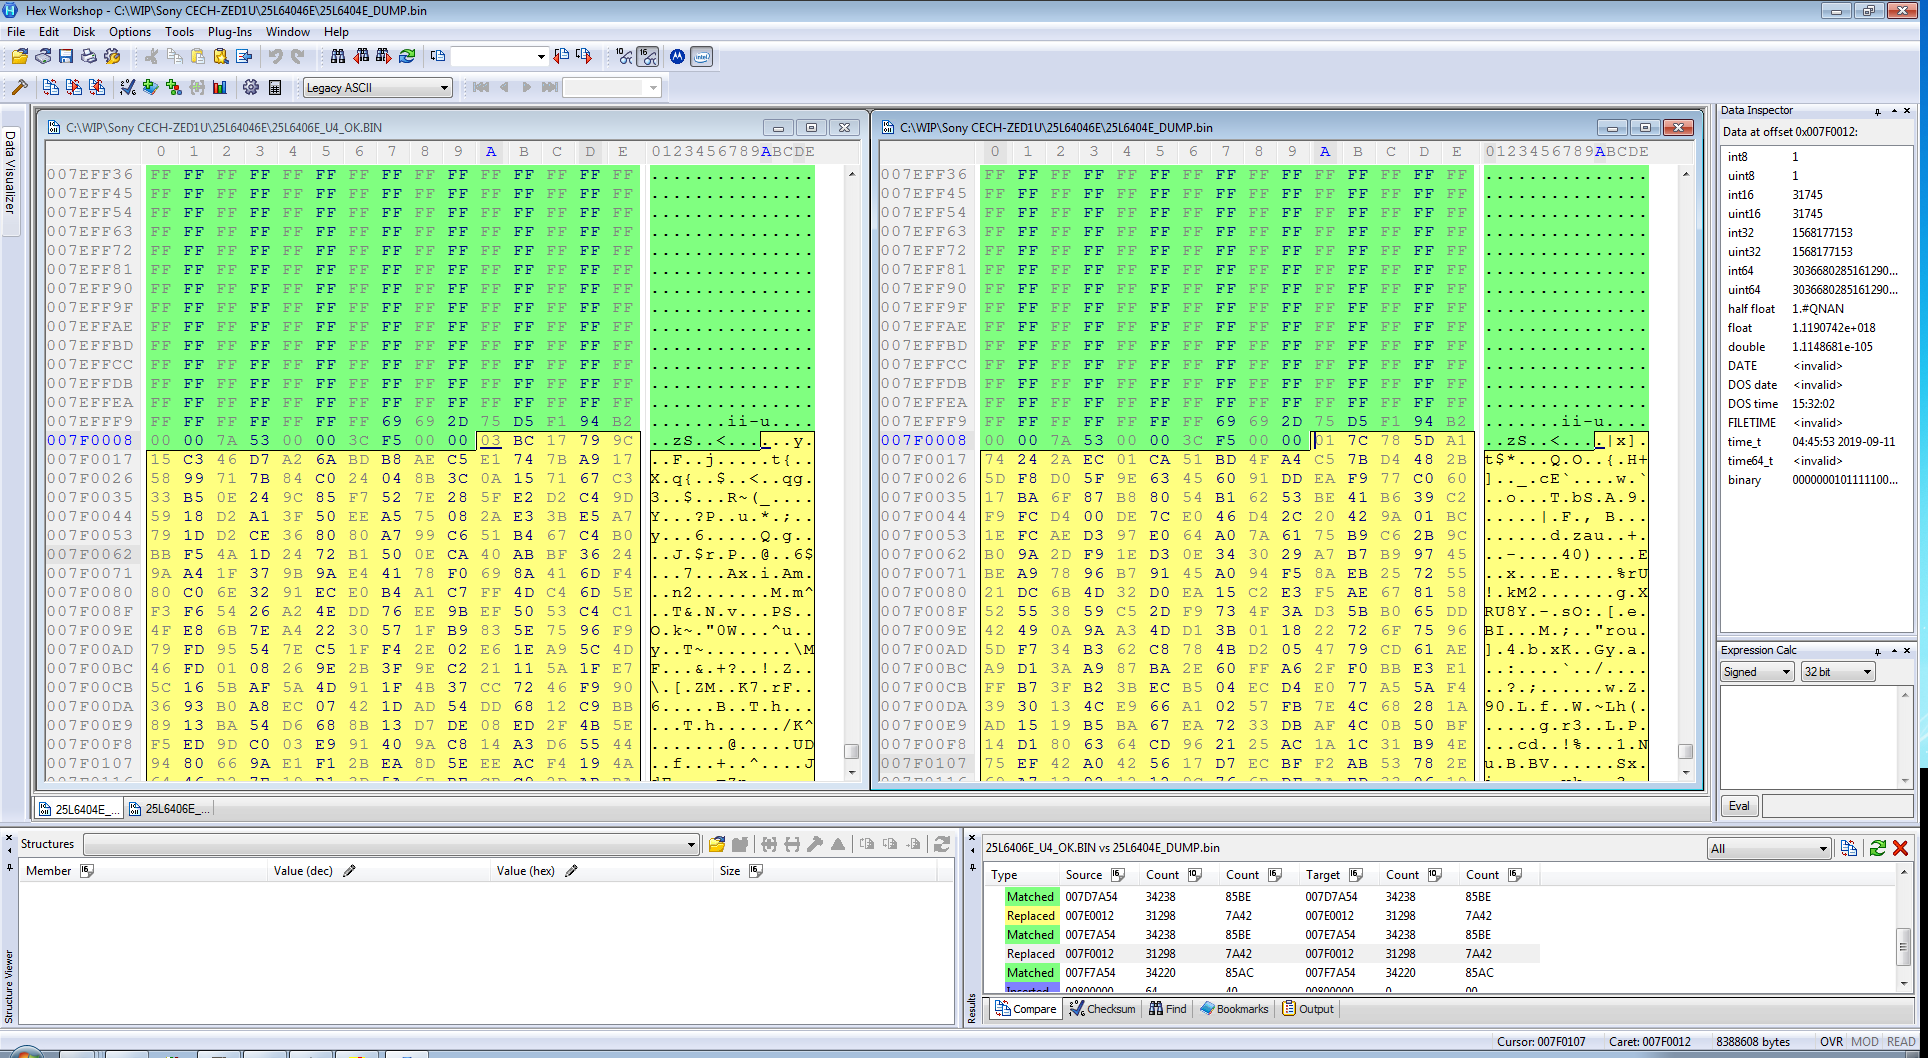
But before re-flashing the old EEPROM, I dumped its content and used my trusty HEX editor to compare it with the content of the EEPROM chip dumped from a working TV set to try to figure out what was going on
As you can see, a good chunk of the 2 dumps were identical but you can see that there is numerous differences spread out throughout the two binary, sometime minimal but sometime quite substantial. I am not certain exactly what is stored on that memory chip and part of its content might well be modified when certain TV setting are changed but I highly doubt that so much of the data would differ between the 2 dumps. My guess as to what is causing the blinking red light issue on those Sony PlayStation TV is that the part of the EEPROM content get overwritten with bogus data as a result of some unknown events during operation. The TV is then unable to finish it boot up sequence because of that corrupted data.
All that was left to do now was resolder the chip and pray to the TV god.
As you can see, it was a great success. Of course we are not solving the core issue so whatever is causing this has the possibility of re-happening in the future.
It should be possible to make the chip read only by tying pin #3 to VCC\GND but since I am unsure of what data is stored in that chip and whether or not the TV needs to modify those settings, I can't really say what adverse effect it could cause on the function of the TV. If the user settings are stored there, change to the color profile and such would reset each time the TV would power off. I might do some test in the near future as it might be a good way of preventing the issue to reappear. You could just configure all your settings and flip a switch to read-only until you need to do another change. To me that would be a perfect solution to this design flaw if it would be working. But since I was planning on giving one of the two TV set to my girlfriend, I still needed a way to easily replace the EEPROM without opening the TV and de-soldering and re-soldering. I just couldn't risk the TV failing in the middle of a Grey's Anatomy episode while I wasn't there to repair it. I decided to go for something foolproof and that I would just install a DIP socket on the back of the TV. The idea is that if the TV fail again in the future, she'll have an already preprogramed EEPROM chip on a SOIC to DIP adapter ready and she would only have to pull the old chip out and put the new one back in the socket.
It didn't turn out as clean as I had hoped for because I had to do some last-minute adjustment as it was not fitting properly. I am still not sure if it wouldn't have been better to just drill a small hole, pass a cable through it and cleanly tape the module on the back plate. But I guess this is still OK looking and more importantly, it's functional.
All in all, it was a very worthwhile purchase for the price I paid. I hope this will help peoples fix their own broken Sony PlayStation TV as they are really nice little TV, when they work that is.
Here are the bin taken from a working TV set (thanks to Zhaojun297 for the dumps)
Update: After some recent testing, It seem like the content of the eeprom is compatible with both mainboard revision model so you can burn the file for the 7400 and use it on a 7200 without issues.
08E1-0DM7200
25L6406E_U4_7200.zip
08E1-0DM7400
25L6406E_U4_7400.zip
And for those that are curious or would like to investigate a bit further, here are the dumps I took from two different CECH-ZED1U 3D TV with the blinking red light issue prior to repairing them.
Corrupted EEPROM bin from defective TV
25L64046E_REDLIGHT_DUMP.zip
Twitter
(function(d, s, id) {
var js, fjs = d.getElementsByTagName(s)[0];
if (d.getElementById(id)) {return;}
js = d.createElement(s); js.id = id;
js.src = "//connect.facebook.net/en_GB/all.js#xfbml=1";
fjs.parentNode.insertBefore(js, fjs);
}(document, 'script', 'facebook-jssdk'));{lang: 'en-GB'}
While browsing eBay for good deals on broken/defective video game console that could be repaired, I came across an auction for Sony PlayStation 24'' 3D LED TV with the infamous blinked red light defect. I remember seeing those TV for sales a few months ago, they looked gorgeous and the price was very good but I decided not to buy it after a quick search on google unearthed hundreds of complains from peoples saying their TV broke within a month of purchases. It seems that most of the TVs of that model suffered from a weird issue that turns them into huge paperweight. They would be working fine one day and would be unable to power on the next. The power light would turn blue for a few seconds, then turn to green for a second or two and finally start flashing red without the LCD lighting up at all. Sony never really acknowledged the problem and quickly discontinued the model. I went a researched the issue and was surprised not to find much information about it except for numerous unhappy customers sharing their blinking red light story. It seems everyone had their theories on what might be causing this issue but no one with electronic experience seemed to be looking into this (or at least sharing it). Not wanting to be stuck with a non-working TV, I pushed back bidding on the auction until I could have a better understanding of the issue. I then came across something peculiar, it seems some ebays store were selling TV repair service for that specific issue. Not only that, they were also selling EEPROM chip for that particular TV set. They were selling them sometime for over 30$, which is a total rip-off. With that information, I was able to narrow my search considerably and ended up finding a long thread about this issue on a forum called Badcaps where I got confirmation that there was a strong chance that the issue was caused by this EEPROM chip.All I really needed now was a binary of the code that was on that memory chip before the TV would go blinky. It was frustrating because the thread was long and the only time someone seemed to have copied the content of working chips after getting help from the other member, they would suddenly disappear from the thread and no binary was shared with the others. This is a behaviour I really despise and definitely not the first time I saw that happen. I suppose they suddenly had dollar signs in their eye and thought they could sell preprogramed replacement chips on eBay like the other few sellers were doing. Now, there is nothing wrong about trying to make a few bucks that way, but at least help out the other peoples that were in the same boat as you and tried to help you out. I was approaching the end of the threads and my chance of finding what I needed looked pretty hopeless until I came across a reply from a user called Zhaojun297 who came out of nowhere with the binary file from the EEPOM chip and various other information for diagnosing those TV. Even more awesome is the fact that he seemed to have registered to the forum just to share that with the other users.
Armed with that information, I was ready to try my luck. Unfortunately, I lost that TV and was pretty bummed about it. That is until I found out that the same seller had 2 other TVs just like that for sale with the exact same issues. I managed to get one for about 27$ + 25$ shipping and about 9$ provincial tax. I then tried my luck and won that one too for a pretty good price too. Second tv set ended up costing me 32$ + 25$ shipping and about 9$ tax. Considering that I was already fully equipped with everything I would be needing if the issue turned out to be the EEPROM chip, I thought it was well worth the investment.
I received the two TVs and they were really in perfect shape, with some protective plastic still in place and even came with the 3D glasses, cables and a PS3 game (Motorstorm Apocalypse)! I was really pleasantly surprised, not bad for a TV I was expecting to be second hand. I immediately got to work on one of them.
The chip in question is a 25L6406E EEPROM (can also be replaced with a MX25L6408E). You can locate it by looking at the silkscreen of the PCB, it's labelled as U4. It is pretty easy to access, all that is required to do is remove the TV backplate. I wasn't sure if the chip would still be usable since nobody was aware of what was actually causing this issue and the few persons that tried to read the EEPROM chip taken from a defective TV reported not being able to ID the chip. Since I couldn't be certain that the chip would be completely dead or if those reports were inaccurate and just due to first time IC programmer users, my first order of business was to de-solder the chip. It might have been possible to read/flash it in circuit but I decided to take the sure way and remove the chip from the PCB for further analysis. I then did what I usually do when I desolder SMD chip and covered the surrounding area with Kapton's heat resistant tape to help give a little bit of protection to the adjacent components and also to prevent the really tiny SMD resistors and capacitor to fly off by accident. Trust me, it happened to me too many times and it gets really problematic figuring out what flew away without the schematic or a second circuit board to compare.
Once the IC was desoldered, I needed a way to read the chip in my universal programmer. There is a couple of ways to achieve this if you do not have the proper programming adapter. The easiest would be to just use a SOIC to DIP adapter like this.
The chip was then ready to have all it's secrets revealed by my trusty GQ-4X. I was curious to confirm what some users had been reporting about the EEPROM no longer being readable once the blinking red light issue appeared. For those using the GQ-4X, you'll notice that once you select MX25L6406 as your device, the software indicates that you need an adapter to have it supported. Well, no SOIC adapter is needed if you have a small SOIC to DIP PCB like I am using. Just insert it like on the picture below. You could even temporarily solder short wire to the pin of your EEPROM and connect them to the ZIF socket of your programmer if you're rushing and do not want to have to wait to receive your PCB adapter.
Those little PCB adapter and pin headers are very cheap on eBay (and pin headers are super practical to have anyway). Only issue with that is that you need to de-solder the chip from the PCB once you are ready to re-solder it in your TV. You could always hold it in place with your finger but those EEPROM takes a while to flash completely and your hand is likely to get tired midway through the procedure. Another practical trick is to use a paper clip to hold the chip in place while reading/programming it.You also need a SOIC to DIP PCP PCB adapter but you won't have the added trouble of soldering and de-soldering the chip on the adapter.
The paper clip method look a bit ghetto, but it work and cost next to nothing. Plus, I love when I can solve a problem with what I have lying around for free. But if you plan on having to read/write other chips with the same footprint, I would advise ordering a programming clip on eBay. They are pretty cheap, I got mine for about 9$ shipping included (once again, thank you China X) ) and will make reading and flashing that type of IC a real breeze.
The chip was not dead and the programmer gave the correct chip's ID right away. That is good news as I had originally bought a few 25L6406 EEPROM chip which can be used as a replacement for the original 25L6408 used on this main board but since the original EEPROM chip seemed to be in working order, I could just reuse the original IC. I erased the chip and made sure it was completely blank with a blank test and then loaded the binary file that came from the working TV set that I found online and re-flashed the content on the chip. I chose to use the small SOIC to DIP adapter because I didn't have the programming clip at that time and also because I was planning on socketing the chip later on, more on that later.
But before re-flashing the old EEPROM, I dumped its content and used my trusty HEX editor to compare it with the content of the EEPROM chip dumped from a working TV set to try to figure out what was going on
As you can see, a good chunk of the 2 dumps were identical but you can see that there is numerous differences spread out throughout the two binary, sometime minimal but sometime quite substantial. I am not certain exactly what is stored on that memory chip and part of its content might well be modified when certain TV setting are changed but I highly doubt that so much of the data would differ between the 2 dumps. My guess as to what is causing the blinking red light issue on those Sony PlayStation TV is that the part of the EEPROM content get overwritten with bogus data as a result of some unknown events during operation. The TV is then unable to finish it boot up sequence because of that corrupted data.
All that was left to do now was resolder the chip and pray to the TV god.
As you can see, it was a great success. Of course we are not solving the core issue so whatever is causing this has the possibility of re-happening in the future.
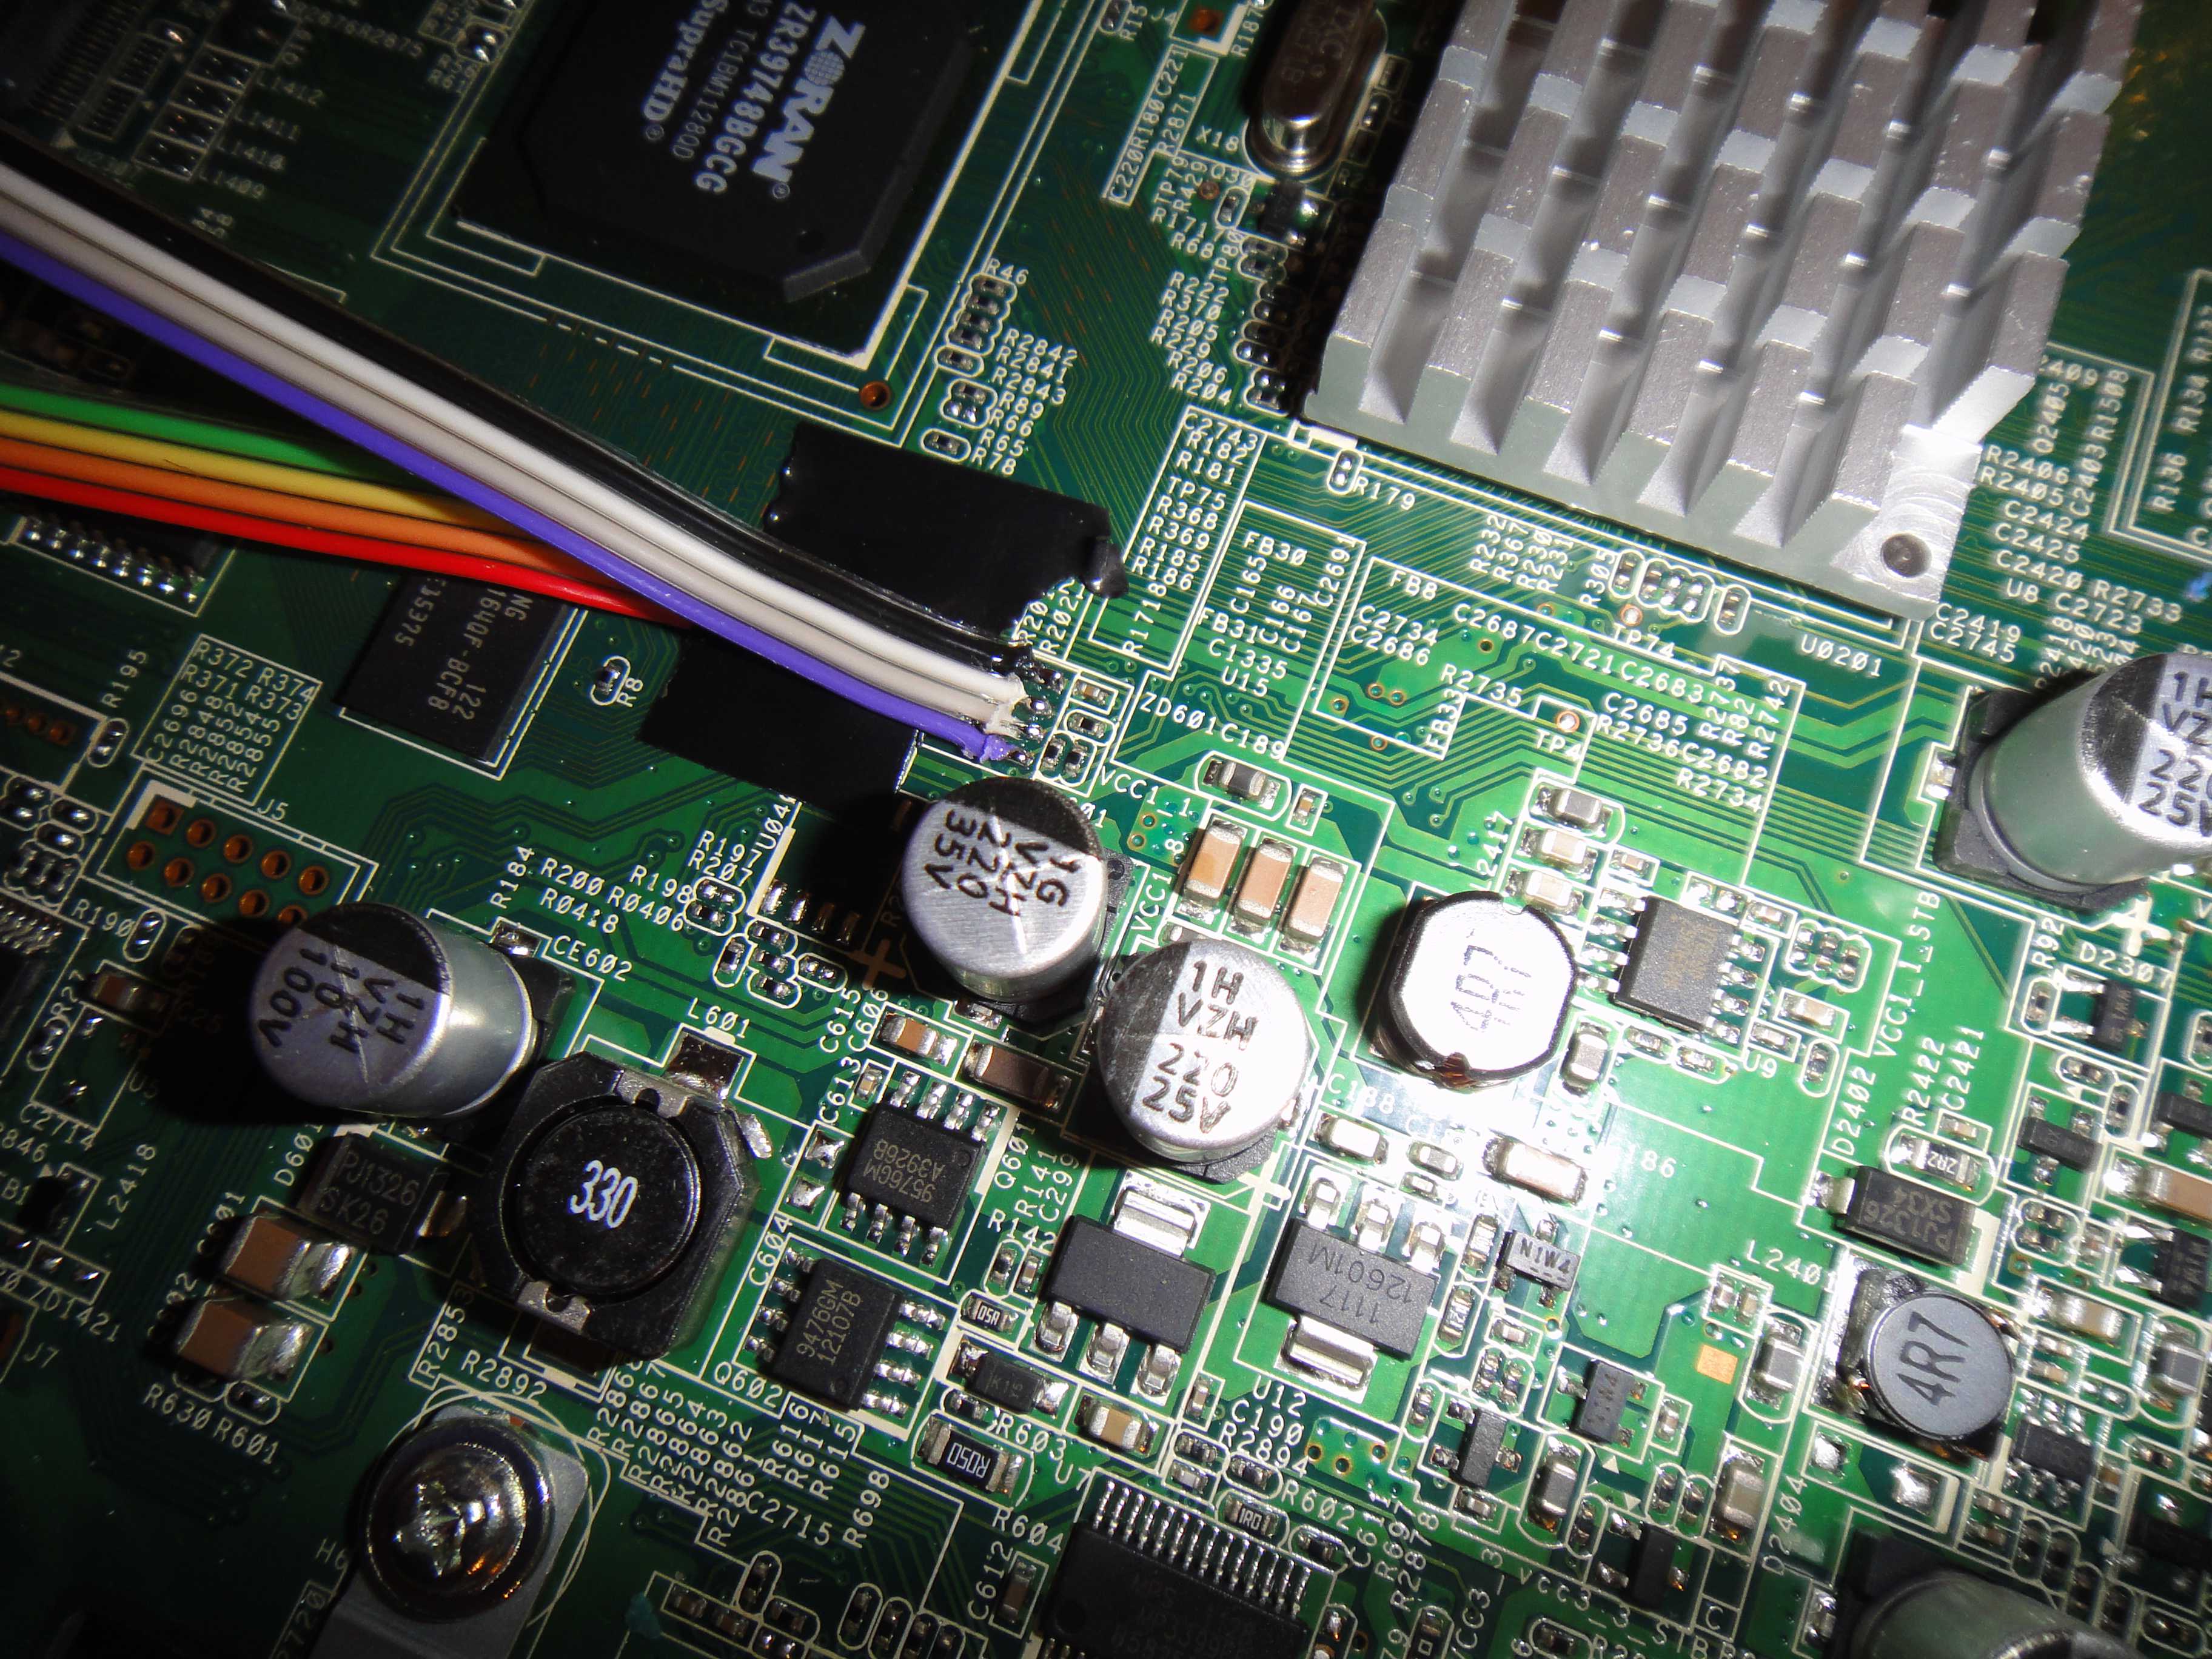
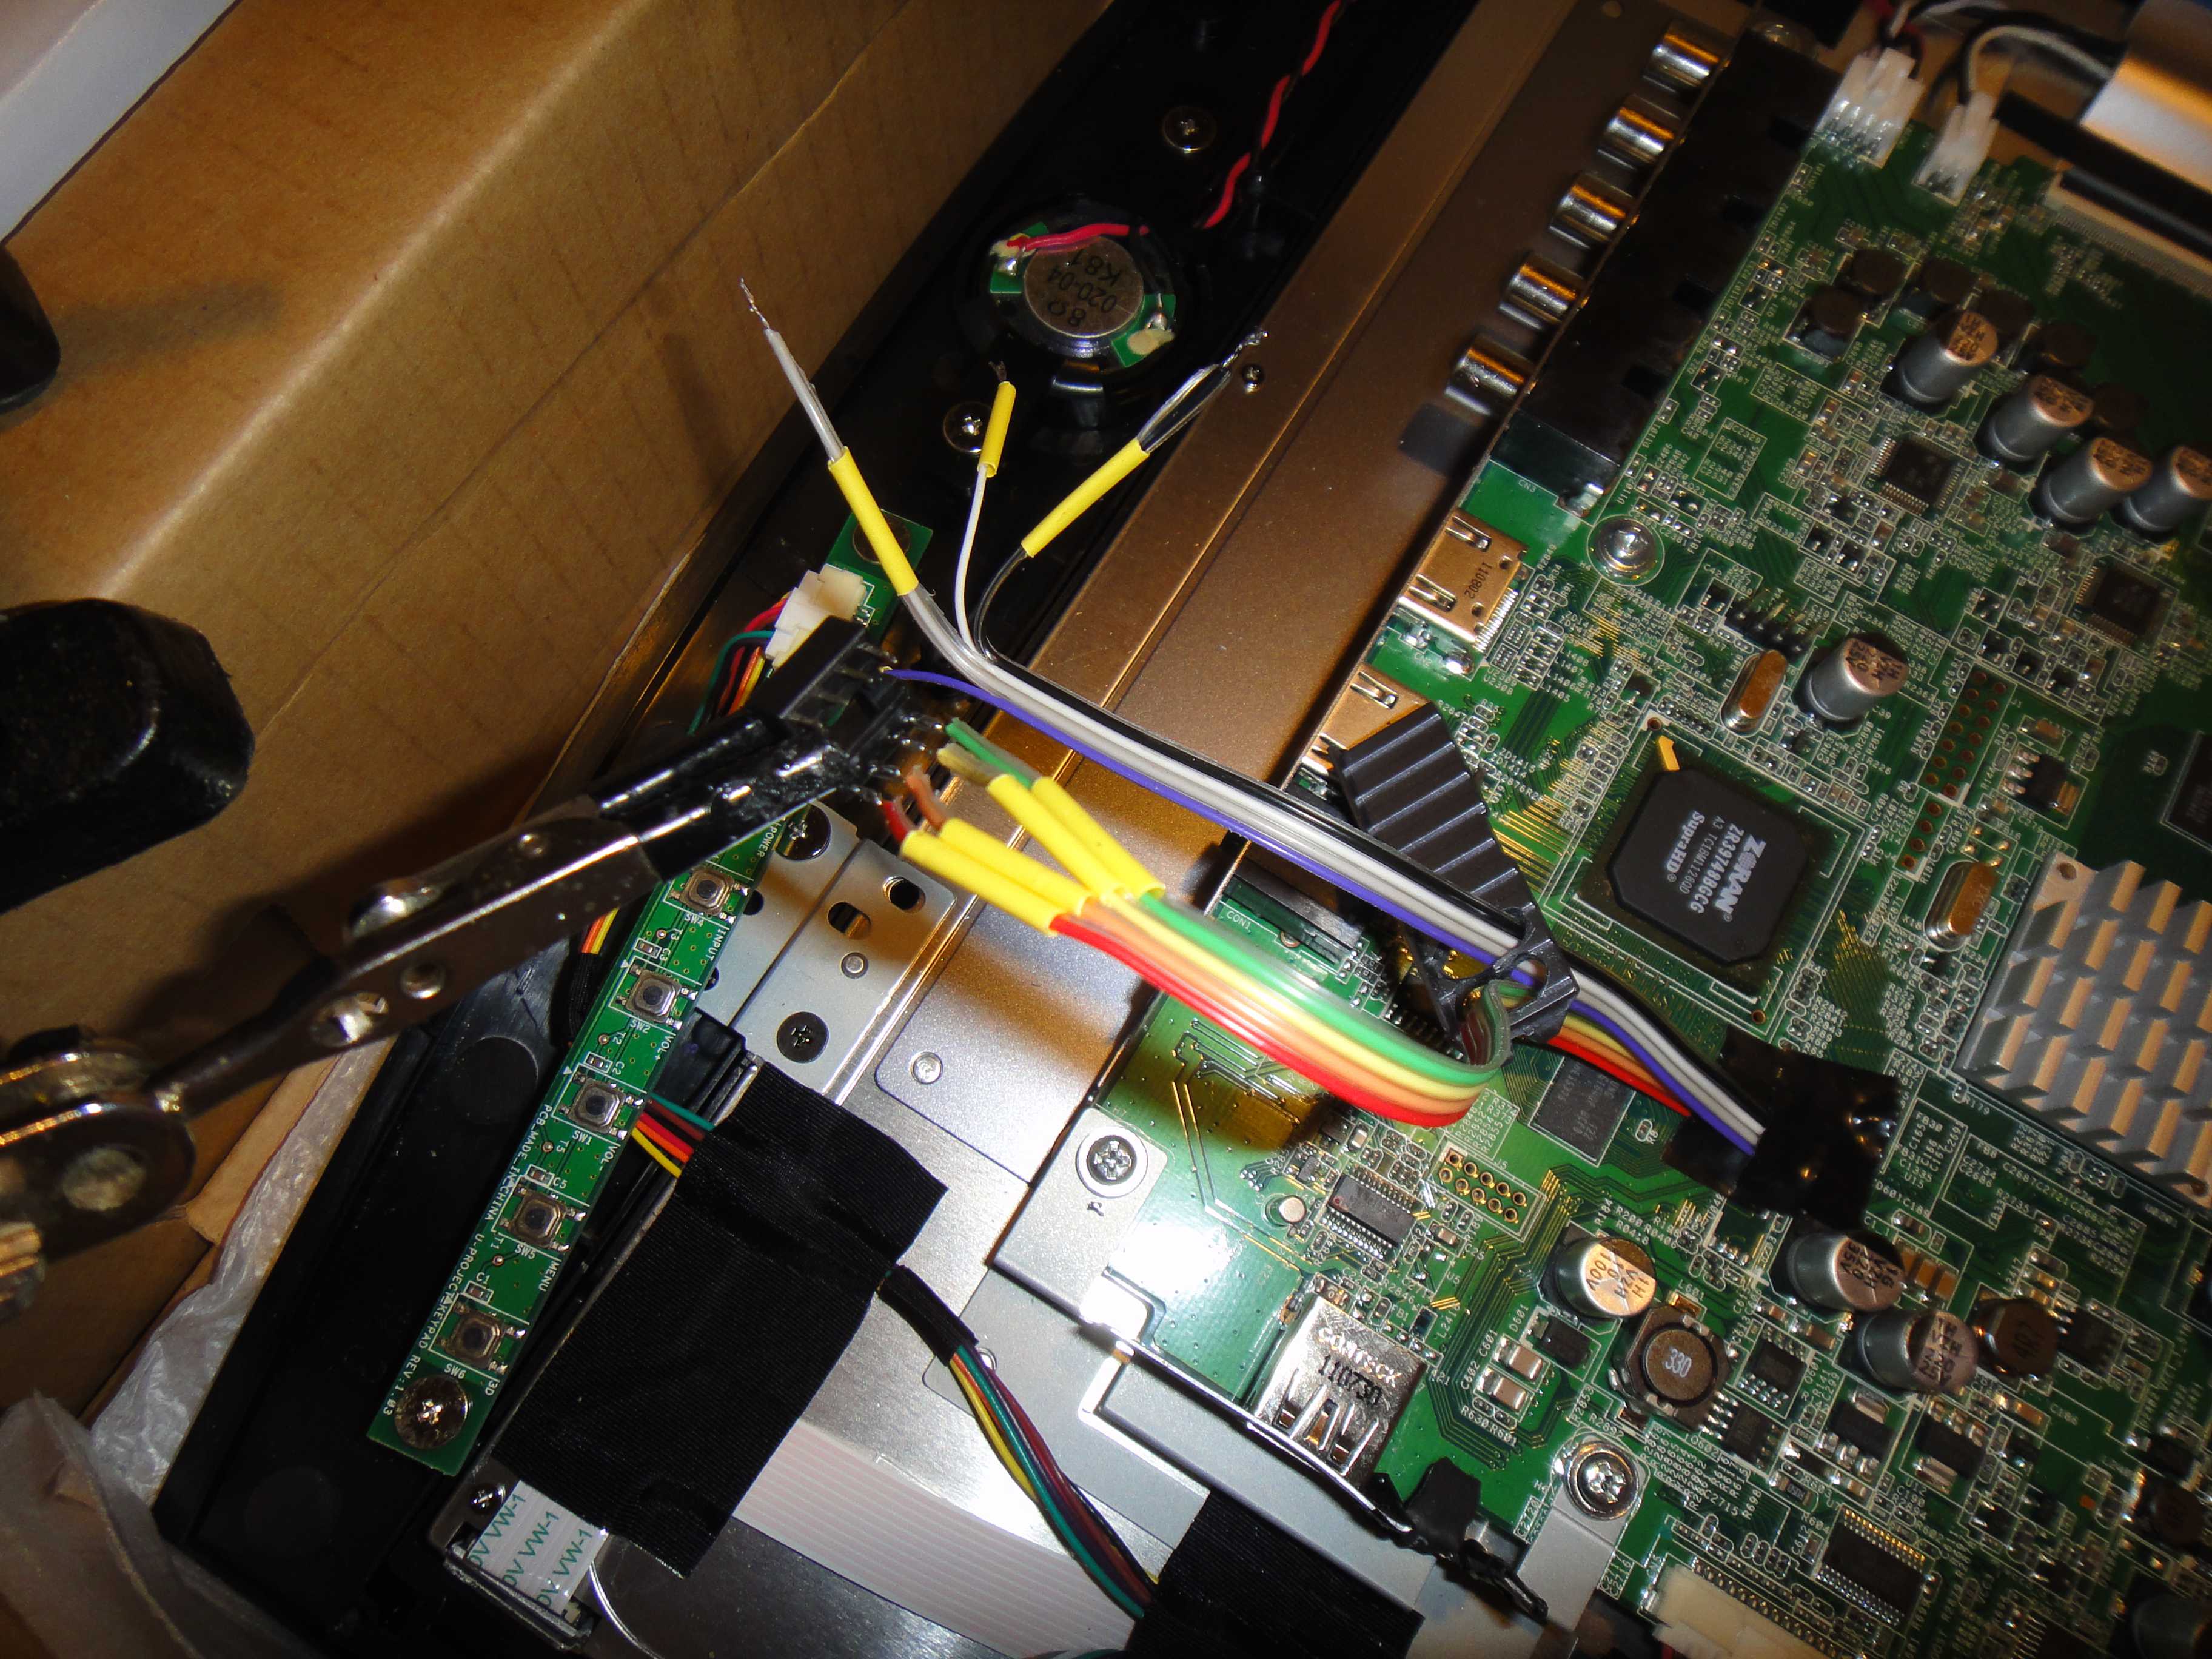
It should be possible to make the chip read only by tying pin #3 to VCC\GND but since I am unsure of what data is stored in that chip and whether or not the TV needs to modify those settings, I can't really say what adverse effect it could cause on the function of the TV. If the user settings are stored there, change to the color profile and such would reset each time the TV would power off. I might do some test in the near future as it might be a good way of preventing the issue to reappear. You could just configure all your settings and flip a switch to read-only until you need to do another change. To me that would be a perfect solution to this design flaw if it would be working. But since I was planning on giving one of the two TV set to my girlfriend, I still needed a way to easily replace the EEPROM without opening the TV and de-soldering and re-soldering. I just couldn't risk the TV failing in the middle of a Grey's Anatomy episode while I wasn't there to repair it. I decided to go for something foolproof and that I would just install a DIP socket on the back of the TV. The idea is that if the TV fail again in the future, she'll have an already preprogramed EEPROM chip on a SOIC to DIP adapter ready and she would only have to pull the old chip out and put the new one back in the socket.
It didn't turn out as clean as I had hoped for because I had to do some last-minute adjustment as it was not fitting properly. I am still not sure if it wouldn't have been better to just drill a small hole, pass a cable through it and cleanly tape the module on the back plate. But I guess this is still OK looking and more importantly, it's functional.
All in all, it was a very worthwhile purchase for the price I paid. I hope this will help peoples fix their own broken Sony PlayStation TV as they are really nice little TV, when they work that is.
Here are the bin taken from a working TV set (thanks to Zhaojun297 for the dumps)
Update: After some recent testing, It seem like the content of the eeprom is compatible with both mainboard revision model so you can burn the file for the 7400 and use it on a 7200 without issues.
08E1-0DM7200
25L6406E_U4_7200.zip
08E1-0DM7400
25L6406E_U4_7400.zip
And for those that are curious or would like to investigate a bit further, here are the dumps I took from two different CECH-ZED1U 3D TV with the blinking red light issue prior to repairing them.
Corrupted EEPROM bin from defective TV
25L64046E_REDLIGHT_DUMP.zip
Twitter
(function(d, s, id) {
var js, fjs = d.getElementsByTagName(s)[0];
if (d.getElementById(id)) {return;}
js = d.createElement(s); js.id = id;
js.src = "//connect.facebook.net/en_GB/all.js#xfbml=1";
fjs.parentNode.insertBefore(js, fjs);
}(document, 'script', 'facebook-jssdk'));{lang: 'en-GB'}
60 out of
100 with
1 ratings
While browsing eBay for good deals on broken/defective video game console that could be repaired, I came across an auction for Sony PlayStation 24'' 3D LED TV with the infamous blinked red light defect. I remember seeing those TV for sales a few months ago, they looked gorgeous and the price was very good but I decided not to buy it after a quick search on google unearthed hundreds of complains from peoples saying their TV broke within a month of purchases. It seems that most of the TVs of that model suffered from a weird issue that turns them into huge paperweight. They would be working fine one day and would be unable to power on the next. The power light would turn blue for a few seconds, then turn to green for a second or two and finally start flashing red without the LCD lighting up at all. Sony never really acknowledged the problem and quickly discontinued the model. I went a researched the issue and was surprised not to find much information about it except for numerous unhappy customers sharing their blinking red light story. It seems everyone had their theories on what might be causing this issue but no one with electronic experience seemed to be looking into this (or at least sharing it). Not wanting to be stuck with a non-working TV, I pushed back bidding on the auction until I could have a better understanding of the issue. I then came across something peculiar, it seems some ebays store were selling TV repair service for that specific issue. Not only that, they were also selling EEPROM chip for that particular TV set. They were selling them sometime for over 30$, which is a total rip-off. With that information, I was able to narrow my search considerably and ended up finding a long thread about this issue on a forum called Badcaps where I got confirmation that there was a strong chance that the issue was caused by this EEPROM chip.All I really needed now was a binary of the code that was on that memory chip before the TV would go blinky. It was frustrating because the thread was long and the only time someone seemed to have copied the content of working chips after getting help from the other member, they would suddenly disappear from the thread and no binary was shared with the others. This is a behaviour I really despise and definitely not the first time I saw that happen. I suppose they suddenly had dollar signs in their eye and thought they could sell preprogramed replacement chips on eBay like the other few sellers were doing. Now, there is nothing wrong about trying to make a few bucks that way, but at least help out the other peoples that were in the same boat as you and tried to help you out. I was approaching the end of the threads and my chance of finding what I needed looked pretty hopeless until I came across a reply from a user called Zhaojun297 who came out of nowhere with the binary file from the EEPOM chip and various other information for diagnosing those TV. Even more awesome is the fact that he seemed to have registered to the forum just to share that with the other users.
Armed with that information, I was ready to try my luck. Unfortunately, I lost that TV and was pretty bummed about it. That is until I found out that the same seller had 2 other TVs just like that for sale with the exact same issues. I managed to get one for about 27$ + 25$ shipping and about 9$ provincial tax. I then tried my luck and won that one too for a pretty good price too. Second tv set ended up costing me 32$ + 25$ shipping and about 9$ tax. Considering that I was already fully equipped with everything I would be needing if the issue turned out to be the EEPROM chip, I thought it was well worth the investment.
I received the two TVs and they were really in perfect shape, with some protective plastic still in place and even came with the 3D glasses, cables and a PS3 game (Motorstorm Apocalypse)! I was really pleasantly surprised, not bad for a TV I was expecting to be second hand. I immediately got to work on one of them.

The chip in question is a 25L6406E EEPROM (can also be replaced with a MX25L6408E). You can locate it by looking at the silkscreen of the PCB, it's labelled as U4. It is pretty easy to access, all that is required to do is remove the TV backplate. I wasn't sure if the chip would still be usable since nobody was aware of what was actually causing this issue and the few persons that tried to read the EEPROM chip taken from a defective TV reported not being able to ID the chip. Since I couldn't be certain that the chip would be completely dead or if those reports were inaccurate and just due to first time IC programmer users, my first order of business was to de-solder the chip. It might have been possible to read/flash it in circuit but I decided to take the sure way and remove the chip from the PCB for further analysis. I then did what I usually do when I desolder SMD chip and covered the surrounding area with Kapton's heat resistant tape to help give a little bit of protection to the adjacent components and also to prevent the really tiny SMD resistors and capacitor to fly off by accident. Trust me, it happened to me too many times and it gets really problematic figuring out what flew away without the schematic or a second circuit board to compare.


Once the IC was desoldered, I needed a way to read the chip in my universal programmer. There is a couple of ways to achieve this if you do not have the proper programming adapter. The easiest would be to just use a SOIC to DIP adapter like this.
The chip was then ready to have all it's secrets revealed by my trusty GQ-4X. I was curious to confirm what some users had been reporting about the EEPROM no longer being readable once the blinking red light issue appeared. For those using the GQ-4X, you'll notice that once you select MX25L6406 as your device, the software indicates that you need an adapter to have it supported. Well, no SOIC adapter is needed if you have a small SOIC to DIP PCB like I am using. Just insert it like on the picture below. You could even temporarily solder short wire to the pin of your EEPROM and connect them to the ZIF socket of your programmer if you're rushing and do not want to have to wait to receive your PCB adapter.

Those little PCB adapter and pin headers are very cheap on eBay (and pin headers are super practical to have anyway). Only issue with that is that you need to de-solder the chip from the PCB once you are ready to re-solder it in your TV. You could always hold it in place with your finger but those EEPROM takes a while to flash completely and your hand is likely to get tired midway through the procedure. Another practical trick is to use a paper clip to hold the chip in place while reading/programming it.You also need a SOIC to DIP PCP PCB adapter but you won't have the added trouble of soldering and de-soldering the chip on the adapter.
The paper clip method look a bit ghetto, but it work and cost next to nothing. Plus, I love when I can solve a problem with what I have lying around for free. But if you plan on having to read/write other chips with the same footprint, I would advise ordering a programming clip on eBay. They are pretty cheap, I got mine for about 9$ shipping included (once again, thank you China X) ) and will make reading and flashing that type of IC a real breeze.

The chip was not dead and the programmer gave the correct chip's ID right away. That is good news as I had originally bought a few 25L6406 EEPROM chip which can be used as a replacement for the original 25L6408 used on this main board but since the original EEPROM chip seemed to be in working order, I could just reuse the original IC. I erased the chip and made sure it was completely blank with a blank test and then loaded the binary file that came from the working TV set that I found online and re-flashed the content on the chip. I chose to use the small SOIC to DIP adapter because I didn't have the programming clip at that time and also because I was planning on socketing the chip later on, more on that later.
But before re-flashing the old EEPROM, I dumped its content and used my trusty HEX editor to compare it with the content of the EEPROM chip dumped from a working TV set to try to figure out what was going on
As you can see, a good chunk of the 2 dumps were identical but you can see that there is numerous differences spread out throughout the two binary, sometime minimal but sometime quite substantial. I am not certain exactly what is stored on that memory chip and part of its content might well be modified when certain TV setting are changed but I highly doubt that so much of the data would differ between the 2 dumps. My guess as to what is causing the blinking red light issue on those Sony PlayStation TV is that the part of the EEPROM content get overwritten with bogus data as a result of some unknown events during operation. The TV is then unable to finish it boot up sequence because of that corrupted data.
All that was left to do now was resolder the chip and pray to the TV god.

As you can see, it was a great success. Of course we are not solving the core issue so whatever is causing this has the possibility of re-happening in the future.
It should be possible to make the chip read only by tying pin #3 to VCC\GND but since I am unsure of what data is stored in that chip and whether or not the TV needs to modify those settings, I can't really say what adverse effect it could cause on the function of the TV. If the user settings are stored there, change to the color profile and such would reset each time the TV would power off. I might do some test in the near future as it might be a good way of preventing the issue to reappear. You could just configure all your settings and flip a switch to read-only until you need to do another change. To me that would be a perfect solution to this design flaw if it would be working. But since I was planning on giving one of the two TV set to my girlfriend, I still needed a way to easily replace the EEPROM without opening the TV and de-soldering and re-soldering. I just couldn't risk the TV failing in the middle of a Grey's Anatomy episode while I wasn't there to repair it. I decided to go for something foolproof and that I would just install a DIP socket on the back of the TV. The idea is that if the TV fail again in the future, she'll have an already preprogramed EEPROM chip on a SOIC to DIP adapter ready and she would only have to pull the old chip out and put the new one back in the socket.


It didn't turn out as clean as I had hoped for because I had to do some last-minute adjustment as it was not fitting properly. I am still not sure if it wouldn't have been better to just drill a small hole, pass a cable through it and cleanly tape the module on the back plate. But I guess this is still OK looking and more importantly, it's functional.
All in all, it was a very worthwhile purchase for the price I paid. I hope this will help peoples fix their own broken Sony PlayStation TV as they are really nice little TV, when they work that is.
Here are the bin taken from a working TV set (thanks to Zhaojun297 for the dumps)
Update: After some recent testing, It seem like the content of the eeprom is compatible with both mainboard revision model so you can burn the file for the 7400 and use it on a 7200 without issues.
And for those that are curious or would like to investigate a bit further, here are the dumps I took from two different CECH-ZED1U 3D TV with the blinking red light issue prior to repairing them.